DIY NAS - Part 3 of 3
After previously deciding to build my own NAS, having defined my requirements in Part 1 and identified suitable hardware and software in Part 2, I will now discuss the build first in terms of the physical hardware build and then the software installation and configuration.
Hardware
I will not detail the exact build process for the Chenbro chassis as that information
is available in the manual, instead I will try and capture my own experience, which will hopefully complement
the available information.
Once all the parts had arrived, the first think to do was un-box everything before
starting to put the system together. My immediate impression of the Chenbro ES34069
NAS chassis was that it was robustly built and manufactured to a high standard.
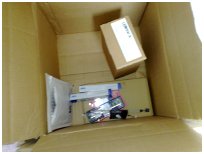
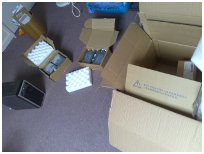
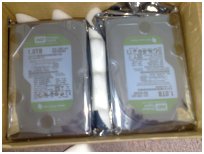
The first step in building the NAS with the Chenbro chassis, is to open up the chassis
and then install the Motherboard. To open up the Chassis you need to remove the side
cover and then the front panel.
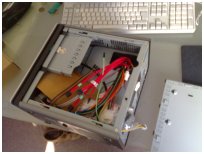
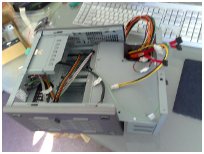
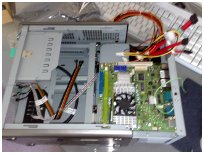
The second step is to get the Card Reader, DVD-RW and 2.5" Hard Disk for the operating
system in place and cabled to the motherboard. The Hard disk needs to go in first,
followed by the Card Reader and then the DVD-RW. I realised this too late, but luckily
the DVD-RW is easily removed!
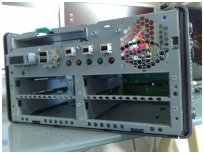
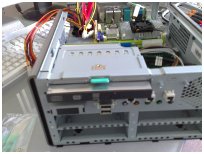
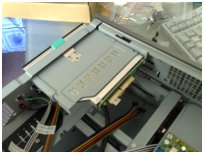
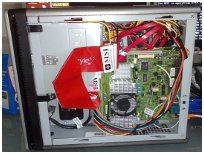
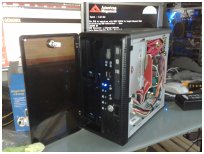
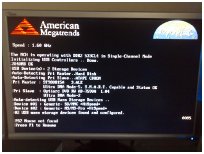
The third step is to finish connecting any cables, secure the cables away from the
fan (I used some plastic cable ties for this) and then switch on and check that the
system POSTs correctly. I did this before inserting any of the storage disks in the
hot swap bays for two reasons - 1) if there is an electrical fault, these disks wont
also be damaged, 2) if there is a POST fault, it rules out these disks as a possibility.
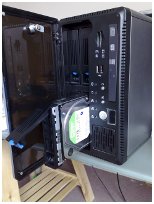
The final step is to install the storage disks into the hot swap caddies and those
into the hot swap bays of the NAS.
This is where I hit upon a show stopper. Securing the disks in the hot swap caddies
requires some special low profile screws, these seemed to be missing, I checked the
manual and it stated that these were shipped with the chassis, but unfortunately not
for me :-(.
After a week of not hearing from the supplier and unable to find suitable screws,
I cracked and decided to improvise. The mounting holes on the hot swap caddies are
a combination of plastic layered on metal, I reasoned that by cutting away the top
plastic layer I would have more space for the screw heads. Very carefully I removed
the plastic around the screw holes using a sharp knife, I am sure I probably voided
some sort of warranty, but now standard hard disk mounting screws fit perfectly :-).
Software
A standard installation of OpenSolaris 2009.06 from CD-ROM was performed. Once the installation was completed, the remaining
configuration was completed from the terminal.
ZFS Storage Configuration
As previously discussed in Part 2, I decided to use a RAIDZ2 configuration across the 4 1TB storage disks.
To configure the disks, I first needed to obtain their id's, this can be done using
the format command -
                aretter@mnemosyne:~$ pfexec format
                Searching for disks...done


                AVAILABLE DISK SELECTIONS:
                0.  c8d0 <DEFAULT cyl 9726 alt 2 hd 255 sec 63>
                /pci@0,0/pci-ide@1f,1/ide@0/cmdk@0,0
                1.  c9d0 <WDC WD10-  WD-WCAU4862689-0001-931.51GB>
                /pci@0,0/pci-ide@1f,2/ide@0/cmdk@0,0
                2.  c9d1 <WDC WD10-  WD-WCAU4864114-0001-931.51GB>
                /pci@0,0/pci-ide@1f,2/ide@0/cmdk@1,0
                3.  c10d0 <WDC WD10-  WD-WCAU4862741-0001-931.51GB>
                /pci@0,0/pci-ide@1f,2/ide@1/cmdk@0,0
                4.  c10d1 <WDC WD10-  WD-WCAU4848518-0001-931.51GB>
                /pci@0,0/pci-ide@1f,2/ide@1/cmdk@1,0
                Specify disk (enter its number): ^C
From this we can see that disks 1 through 4 are our 1TB storage disks. The following
command uses the ids of these disks to create a new RAIDZ2 zpool called 'thevault'
consisting of these disks -
aretter@mnemosyne:~$ pfexec zpool create thevault raidz2 c9d0 c9d1 c10d0 c10d1
We can then view/check the newly created zpool -
                aretter@mnemosyne:~$ pfexec zpool list
                NAME       SIZE   USED  AVAIL    CAP  HEALTH  ALTROOT
                rpool       74G  4.06G  69.9G     5%  ONLINE  -
                thevault  3.62T  1.55M  3.62T     0%  ONLINE  -

                aretter@mnemosyne:~$ pfexec zpool status thevault
                pool: thevault
                state: ONLINE
                scrub: none requested
                config:

                NAME            STATE       READ    WRITE   CKSUM
                thevault        DEGRADED    0       0       0
                raidz2      DEGRADED    0       0       0
                c9d0    ONLINE      0       0       0
                c9d1    ONLINE      0       0       0
                c10d0   ONLINE      0       0       0
                c10d1   ONLINE      0       0       0

                errors: No known data errors
Now that we have our zpool we need to create some filesystems to make use of it. This
NAS system will be used on our home network and so I opted for two simple filesystems,
a 'public' filesystem which everyone may read and write to and a 'private' filesystem
for more personal data -
                aretter@mnemosyne:~$ pfexec zfs create thevault/public
                aretter@mnemosyne:~$ pfexec zfs create thevault/private

                aretter@mnemosyne:~$ pfexec zfs list
                NAME                        USED  AVAIL  REFER  MOUNTPOINT
                rpool                      4.92G  67.9G  77.5K  /rpool
                rpool/ROOT                 2.85G  67.9G    19K  legacy
                rpool/ROOT/opensolaris     2.85G  67.9G  2.76G  /
                rpool/dump                 1019M  67.9G  1019M  -
                rpool/export               84.5M  67.9G    21K  /export
                rpool/export/home          84.5M  67.9G    21K  /export/home
                rpool/export/home/aretter  84.5M  67.9G  84.5M  /export/home/aretter
                rpool/swap                 1019M  68.8G   137M  -
                thevault                    180K  1.78T  31.4K  /thevault
                thevault/private           28.4K  1.78T  28.4K  /thevault/private
                thevault/public            28.4K  1.78T  28.4K  /thevault/public
Users and Permissions
Now that we have our filesystems we need to setup some accounts for our network users
and assign permissions on the filesystems for the users.
I will create accounts for each of the three other people in the house and to make
permission administration easier, each of these users will also be added to a common
group called 'vusers' -
                aretter@mnemosyne:~$ pfexec groupadd vusers

                aretter@mnemosyne:~$ pfexec groupadd phil
                aretter@mnemosyne:~$ pfexec groupadd lesley
                aretter@mnemosyne:~$ pfexec groupadd andy

                aretter@mnemosyne:~$ pfexec useradd -c “Philip” -g phil -G vusers -m -b /export/home -s /bin/bash phil
                aretter@mnemosyne:~$ pfexec useradd -c “Lesley” -g lesley -G vusers -m -b /export/home -s /bin/bash lesley
                aretter@mnemosyne:~$ pfexec useradd -c “Andrew” -g andy -G vusers -m -b /export/home -s /bin/bash andy
So that all users in the 'vusers' group can read and write to the public filesystem,
I set the following permissions -
                aretter@mnemosyne:~$ pfexec chgrp vusers /thevault/public
                aretter@mnemosyne:~$ pfexec chmod g+s /thevault/public
                aretter@mnemosyne:~$ pfexec chmod 770 /thevault/public
I then set about creating a private folder for each of the users on the private filesystem.
All users in 'vusers' can access the private filesystem, but users cannot access each
others private folder -
                aretter@mnemosyne:~$ pfexec chgrp vusers /thevault/private
                aretter@mnemosyne:~$ pfexec chmod 770 /thevault/private

                aretter@mnemosyne:~$ pfexec mkdir /thevault/private/phil
                aretter@mnemosyne:~$ pfexec chmown phil:phil /thevault/private/phil
                aretter@mnemosyne:~$ pfexec chmod 750 /thevault/private/phil

                aretter@mnemosyne:~$ pfexec mkdir /thevault/private/lesley
                aretter@mnemosyne:~$ pfexec chmown lesley:lesley /thevault/private/lesley
                aretter@mnemosyne:~$ pfexec chmod 750 /thevault/private/lesley

                aretter@mnemosyne:~$ pfexec mkdir /thevault/private/andy
                aretter@mnemosyne:~$ pfexec chmown andy:andy /thevault/private/andy
                aretter@mnemosyne:~$ pfexec chmod 750 /thevault/private/andy
Network Shares
Well this is a NAS after all, and so we need to make our filesystems available over
the network. Apart from myself, everyone else in the house uses Microsoft Windows
(XP, Vista and 7) on their PCs, and because of this fact I decided to just share the
filesystem using OpenSolaris's native CIFS service.
I used this this article in the Genuix Wiki as a reference for installing the CIFS service. I took the following
steps to install the CIFS service and join my workgroup '88MONKS' -
                aretter@mnemosyne:~$ pfexec pkg install SUNWsmbskr
                aretter@mnemosyne:~$ pfexec pkg install SUNWsmbs

                ...I had to reboot the system here, for the changes to take effect...

                aretter@mnemosyne:~$ pfexec svcadm enable -r smb/server
                aretter@mnemosyne:~$ pfexec smbadm join -w 88MONKS
To authenticate my users over CIFS I needed to enable the CIFS PAM module by adding
this to the end of /etc/pam.conf -
other password required pam_smb_passwd.so.1 nowarn
Once you have enabled the CIFS PAM module, you need to (re)generate passwords for
your users who will use CIFS, this is done with the standard 'passwd' command. Then
the last and final step is to export the ZFS filesystems over CIFS -
                aretter@mnemosyne:~$ pfexec zfs create -o casesensitivity=mixed thevault/public
                aretter@mnemosyne:~$ pfexec zfs create -o casesensitivity=mixed thevault/private
Build Issues
When building your own custom system from lots of different parts (some of which are
very new to market), there are likely to be a few unanticipated issues during the
build and this was no exception. Luckily the issues I had were all minor -
- Not enough USB port headers - The MSI IM-945GC motherboard I used only had two USB
headers. I used these to connect the NAS SD card reader, which meant that I could
not connect the USB sockets on the front of the NAS chassis. This is not a major problem
as I can just use the sockets on the back.
- Missing hard disk caddy screws - As soon as I discovered these were missing, I contacted
mini-itx.com by email (they have no phone number). After several emails and only one
very poor response saying they would look into it, I gave up on mini-itx.com. As described
above, I managed to work around this issue, although after about 3 weeks a package
of screws did turn up in the post unannounced and I can only assume these are from
mini-itx.com. My advice to anyone would now be DO NOT USE mini-itx.com, their after-sales customer service is abysmal, I probably should have guessed by
the fact that when I made a pre-sales enquiry they never even replied!
- Fitting everything in - Mini-ITX form cases, can be quite a tight fit once you have
all the cabling in. I would recommend avoiding using large cables such as IDE where
possible. It took me a couple of attempts at re-routing my cables to make best use
of the available space.
usage Findings
Once the NAS was built and functional I decided to make some measurements to find
out its real power consumption (whether it is as low as I had hoped) and also its
network performance for file operations.
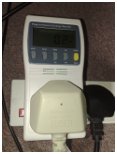 For measuring the power usage I used a simple Plug-in Energy monitor that I got from
my local Maplin store. Whilst this device gives me a good idea of power consumption, it is actually
very hard to get consistent/reliable figures from it, as the readout tends to fluctuate
quite rapidly. The figures I present here are my best efforts and the average figures
are based on observation not calculation.
For measuring the network performance, I placed a 3.1GB ISO file on the public ZFS
RAIDZ2 filesystem and performed timed copies of it to two different machines using
both SCP and CIFS. The first machine was a Dell Latitude D630 Windows XP SP3 laptop, which is connected
to our home Gigabit Ethernet LAN using 802.11g wireless networking (54Mbit/s) via our router. The second machine I used was a custom
desktop based on an AMD Phenom X4, MSI K92A Motherboard with Gigabit Ethernet, 8GB
RAM and Ubuntu x64 9.04, which is connected directly to our home Gigabit Ethernet
LAN.
Power and Performance
|
| Task Description |
Actual Power Consumption |
Performance |
| Standby (Power-off) |
2W |
N/A |
| Boot |
50W |
N/A |
| Idling |
40W to 47W (avg. 42W) |
N/A |
| File Duplication on RAIDZ2 ZFS |
54W to 57W (avg. 55W) |
50MB/s |
| SCP Copy to Wifi Laptop |
40W to 57W (avg. 42W) |
473KB/s |
| CIFS Copy to Wifi Laptop |
40W to 57W (avg. 42W) |
1.2MB/s |
| SCP Copy to GbE Desktop |
48W to 52W (avg. 49W) |
22MB/s |
| CIFS Copy to GbE Desktop |
49W to 52W (avg. 50W) |
25MB/s |
Conclusions
Overall I am very happy with my DIY NAS system, I believe it meets the requirements
I set out in Part 1 very well. It is physically small and quiet, provides 2TB of reliable storage and
does not use any proprietary drivers.
The power consumption is slightly higher (42W to 50W) than I estimated (33W to 50W),
which is not unsurprising considering I only had figures for some components and not
a complete system. However, I have also measured the power consumption of my desktop
with and without the old HighPoint RAID 5 storage that I am aiming to replace with
this NAS, and without it I have saved a huge 40W! Admittedly I am now using 10W more
overall, but I have a networked storage system that is used by the whole house. I
think if I replaced my desktop's primary hard disk with a Western Digital Green drive
I could probably claw back those additional watts anyhow.
I am very happy with the network performance, and it is more than adequate for our
needs. I have been told that I could probably increase it with careful tuning of various
OpenSolaris configuration options.
The cost whilst high for a home IT mini-project, is not unreasonable, and I think
I would struggle to find a commercial product at the same price point which offered
the same capabilities and flexibility.
Further Considerations
We have both an XBox 360 and PlayStation 3 in our house that can be used as media
streamers. The PS3 requires a DLNA source and the 360 a UPnP source, and it looks like ps3mediaserver should support both. However ps3mediaserver also requires a number of open source
tools such as MPlayer and ffmpeg amongst others. There are no OpenSolaris packages
for these, so I will have to figure out how to compile them, which will take some
time.
A website for controlling and administering the NAS would be a nice feature. Especially
if you could schedule HTTP/FTP/Torrent downloads straight onto the NAS. When I have
a rainy week, I may attempt this. I could see this eventually leading to a custom
cut-down OpenSolaris distribution built especially for NAS.
Adam Retter posted on Sunday, 5th July 2009 at 20.10 (GMT+01:00)
Updated: Sunday, 5th 2009 at July 20.10 (GMT+01:00)
tags: ChenbroOpenSolarisNASDIYZFSRAIDZ2CIFS
|
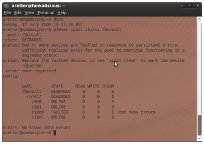 After having finally built my NAS and had it happily working away in the background for a couple of weeks, it would
seem that failure has struck; one of the disks forming the ZFS RAIDZ2 storage pool
has failed! Whilst I am sure this seems a little ironic or sounds like a commissioned
advert for ZFS by Sun, I can only try to reassure you that this is not the case.


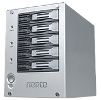 Originally after much searching, I found the
  The only other NAS chassis that I eventually found was the


