Blog

Ponderings of a kind

This is my own personal blog, each article is an XML document and the code powering it is hand cranked in XQuery and XSLT. It is fairly simple and has evolved only as I have needed additional functionality. I plan to Open Source the code once it is a bit more mature, however if you would like a copy in the meantime drop me a line.

Atom Feed

Authenticating with Redstone XML-RPC Proxy

Basic HTTP Authentication for Redstone XML-RPC Client

Redstone is an excellent and simple XML-RPC library. Recently when trying to create a simple XML-RPC client using Redstone in some example code for a book I am writing, I needed to be able to authenticate with the 3rd-party XML-RPC server.

The server that I was attempting to communicate with (eXist) requires at least HTTP Basic Authentication for operations that require a user to have been granted various permissions. Redstone provides no explicit functionality for authentication or information on how to achieve such things. However as its Open Source, I dug through the code and discovered that it uses a standard java.net.HttpUrlConnection. Whilst it is quite possible to do HTTP Basic Authentication with HttpUrlConnections by setting the correct HTTP Header, I was making use of Redstone's XML-RPC Proxy facility, to help keep my client code simple, which unfortunately does not expose anymore than an instance of the Interface you proxy. Another quick examination of the Redstone code showed that they were using java.lang.reflect.Proxy to create a dynamic proxy of the provided Interface.

We can use Proxy.getInvocationHandler on our XML-RPC proxy to get the Invocation Handler, which happens to be an instance of redstone.xmlrpc.XmlRpcProxy which offers us the method setRequestProperty(name, value). Any request properties set in this way are set as Headers on the Http Request used by the XML-RPC proxy.

Example code for HTTP Basic Authentication with Redstone XML-RPC Proxy Client

//create your XML-RPC Proxy
final MyInterface rpc = (MyInterface)XmlRpcProxy.createProxy(new URL("http://some-server:8080/xmlrpc"), "", new Class[] { MyInterface.class }, true );

final String username = "your-username";
final String password = "your-password";

//concatenate and base64 encode the username and password (suitable for use in HTTP Basic Authentication)
final String auth = javax.xml.bind.DatatypeConverter.printBase64Binary((username + ":" + password).getBytes());

//set the HTTP Header for Basic Authentication
((XmlRpcProxy)Proxy.getInvocationHandler(rpc)).setRequestProperty("Authorization", "Basic " + auth);

//you can now do authenticated XML-RPC calls with the proxy
rpc.yourMethod();


Adam Retter posted on Saturday, 11th May 2013 at 15.49 (GMT+01:00)
Updated: Saturday, 11th 2013 at May 15.49 (GMT+01:00)

tags: RedstoneXML-RPCJavaHTTPAuthentication

0 comments | add comment

Keeping GitHub pages up to date with your master

Auto-sync from master to gh-pages

For the RESTXQ specification that I am working on as part of my EXQuery efforts, I need to write up a "formal" specification for RESTXQ. The EXQuery RESTXQ code base lives on GitHub (http://github.com/exquery/exquery), and the specification has been authored in the exquery-restxq-specification module.

The RESTXQ specification is authored in HTML using Robin Berjon's excellent ReSpec tool. As specifications are arguably meant to be read by people, it would be nice if we could present the work in progress from the source repository to users as a web page.

Fortunately GitHub provides a nice facility for web pages called GitHub Pages. However, the pages are taken from a branch of your GitHub repository called gh-pages. The advantage of this is that your 'pages' can contain different content to your main source code base (i.e. your master branch). If your page content is in your master branch though, you need a facility for keeping the copy in your gh-pages branch up to date with your commits to master.

I will not detail how to setup GitHub pages, that is better covered here.

I simply wanted to be able to keep a single folder called exquery-restxq-specification from master in sync with my gh-pages. When creating my gh-pages repository, following the instructions above, rather than delete everything in the gh-pages branch, I deleted everything except the exquery-restxq-specification folder, and then committed and pushed.

To keep the folder in sync across both branches, we can add a post-commit hook locally to the master branch, so that when we commit changes to that folder in master, the changes are propagated to the gh-pages branch.

To add the post-commit hook, create the script: your-repo/.git/hooks/post-commit

    #!/bin/sh
    git checkout gh-pages                                           #switch to gh-pages branch
    git checkout master -- exquery-restxq-specification             #checkout just the exquery-restxq-specification folder from master
    git commit -m "Merge in of specification from master branch"    #commit the changes
    # git push                                                      #uncomment if you want to auto-push
    git checkout master                                             #switch back to the master branch
If you are on Linux/MacOSX/Unix, you must ensure that the script has execute permissions, otherwise Git will not execute it.

Now simply changing something in the exquery-restxq-specification folder in the master branch and committing, will cause Git to also sync the changes to the gh-pages branch.
As a further exercise it might be interesting to take the commit message for gh-pages from the last commit message of master...

Adam Retter posted on Sunday, 19th August 2012 at 12.03 (GMT+01:00)
Updated: Sunday, 19th 2012 at August 12.03 (GMT+01:00)

tags: XQueryFull-TextSearcheXist-db

0 comments | add comment

XQuery Matching Based on Word Distance

A distraction from work

Whilst at this moment I am meant to be preparing my sessions of the XML Summer School this year, I was reviewing Priscilla Walmsley's slides from last year and saw the following example given as a 'Search and Browse' use-case for XQuery:

"What medical journal articles since 2004 mention "artery" and "plaque" within 3 words of each other?"

I immediately thought to myself 'Hmm... that would be a tricky one to code in XQuery!. Of course the easy answer would be to use the W3C XPath and XQuery Full-Text extensions, for example:

            
    /journal[xs:date(@date) ge xs:date("2004-01-01")] contains text "artery" ftand "plaque" distance at most 3 words

Sadly however, eXist-db, which is the XQuery platform I like to use, does not implement the W3C Full-Text extensions yet. Instead it has its own full-text extensions based on Lucene, so in eXist-db the equivalent would be:

   
    /journal[xs:date(@date) ge xs:date("2004-01-01")][ft:query(., '“artery plaque”~3')]

If I stopped there however, it would be quite a short blog post. It also appears from the implementation test results that the W3C XPath and XQuery Full-Text specification is not widely implemented. So how about implementing this in pure XQuery? I took the challenge, and my Solution is below.
I would be interested to see attempts at a more elegant implementation or suggestions for improvements.

(:~
: Simple search for words within a distance of each other
:
: Adam Retter <[email protected]>
:)
xquery version "1.0";
        
declare function local:following-words($texts as text()*, $current-pos, $distance, $first as xs:boolean) {
        
    if(not(empty($texts)))then
        let $text := $texts[$current-pos],
        $next-tokens :=
            if($first)then
                (: ignore first word on first invokation, as its our current word :)
                let $all-tokens := tokenize($text, " ") return
                    subsequence($all-tokens, 2, count($all-tokens))
            else
                tokenize($text, " ")
        return
        
            if(count($next-tokens) lt $distance)then
            (
                $next-tokens,
                if($current-pos + 1 lt count($texts))then
                    local:following-words($texts, $current-pos + 1, $distance - count($next-tokens), false())
                else()
            )	
            else
                subsequence($next-tokens, 1, $distance)
    else()
};
        
declare function local:following-words($texts as text()*, $current-pos, $distance) {
    local:following-words($texts, $current-pos, $distance, true())
};
        
declare function local:preceding-words($texts as text()*, $current-pos, $distance) {
        
    let $prev := $texts[$current-pos - 1] return
        if(not(empty($prev)))then
            let $prev-tokens := tokenize($prev, " ") return
                if(count($prev-tokens) lt $distance)then
                (
                    local:preceding-words($texts, $current-pos - 1, $distance - count($prev-tokens)),
                    $prev-tokens
                )	
                else
                    subsequence($prev-tokens, count($prev-tokens) - $distance + 1, count($prev-tokens))
        else()
};
        
(:~
: Performs a search within the text nodes for words within a distance of ech other
:)
declare function local:found-within($texts as text()*, $distance, $words-to-find as xs:string+) as xs:boolean {

    let $results := 

        for $text at $current-pos in $texts
        let $current-word := tokenize($text, " ")[1],
        $preceding-words := local:preceding-words($texts, $current-pos, $distance),
        $following-words := local:following-words($texts, $current-pos, $distance)
        return

            for $word at $i in $words-to-find
            let $other-words-to-find := $words-to-find[position() ne $i]
            return
                if($current-word eq $word and ($other-words-to-find = $preceding-words or $other-words-to-find = $following-words))then
                    true()
                else
                    false()

    return $results = true()            
};
        
(:~
: Just for debugging to help people understand
:)
declare function local:debug($texts as text()*, $current-pos, $distance) {
    <group distnace="{$distance}">
        <text>{$texts[$current-pos]}</text>
        <preceding-words>
            {
            let $preceding := local:preceding-words($texts, $current-pos, $distance) return
                $preceding
            }
        </preceding-words>
        <current-word>{tokenize($texts[$current-pos], " ")[1]}</current-word>
        <following-words>
        {
            let $following := local:following-words($texts, $current-pos, $distance) return
                $following
        }
        </following-words>
    </group>
};
        
(: params :)
let $words-to-find := ("artery", "plaque"),
$distance := 3 return
        
    (: main :)    
    for $journal in /journal
    [xs:date(@date) ge xs:date("2004-01-01")]
    [local:found-within(.//text(), $distance, $words-to-find)]
    return
        $journal
        
        (: comment out the above flwor and uncomment below, to see debugging output :)
        (:
        for $journal in /journal[xs:date(@date) ge xs:date("2004-01-01")]
        let $texts := $journal//text() return
            for $current-pos in (1 to count($texts)) return 
                local:debug($texts, $current-pos, $distance)	  
        :)
        

Adam Retter posted on Saturday, 18th August 2012 at 18.43 (GMT+01:00)
Updated: Sunday, 19th 2012 at August 16.36 (GMT+01:00)

tags: XQueryFull-TextSearcheXist-db

1 comments | add comment

EXPath HTTP Client and Heavens Above

HTTP Client for picky web-servers

Whilst writting a data mash-up service for the Predict the Sky challenge at the NASA Space Apps hack day at the Met Office, I hit a very strange problem with the EXPath HTTP Client. I needed to scrape data from a webpage on the Heavens Above website http://heavens-above.com/PassSummary.aspx?showAll=x&satid=25544&lat=50.7218&lng=-3.5336&loc=Unspecified&alt=0&tz=CET and so I wrote the following XQuery:

    declare namespace http = "http://expath.org/ns/http-client";

    http:send-request(
        <http:request method="get" href="http://heavens-above.com/PassSummary.aspx?showAll=x&satid=25544&lat=50.7218&lng=-3.5336&loc=Unspecified&alt=0&tz=CET"/>
    )
            

However that query would always return a HTTP 404 result:

    <http:response xmlns:http="http://expath.org/ns/http-client" status="404" message="Not Found">
        <http:header name="content-length" value="1176"/>
        <http:header name="content-type" value="text/html"/>
        <http:header name="server" value="Microsoft-IIS/7.5"/>
        <http:header name="x-powered-by" value="ASP.NET"/>
        <http:header name="date" value="Sun, 29 Apr 2012 14:36:40 GMT"/>
        <http:header name="connection" value="keep-alive"/>
        <http:body media-type="text/html"/>
    </http:response>
            

Now, this seemed very strange to me as I could paste that URL into any Web Browser and be returned a HTML Web Page! So I broke out one of my old favourite tools, Wireshark, to examine the differences between the HTTP request made by the EXPath HTTP Client (which is really the Apache Commons HTTP Components Client underneath) and cURL. I decided to use cURL as its very simple and so therefore I knew it would not insert unnessecary headers into a request, of course I made sure it worked first!

cURL HTTP conversation
    GET /PassSummary.aspx?showAll=x&satid=25544&lat=50.7218&lng=-3.5336&loc=Unspecified&alt=0&tz=CET HTTP/1.1
    User-Agent: curl/7.21.4 (universal-apple-darwin11.0) libcurl/7.21.4 OpenSSL/0.9.8r zlib/1.2.5
    Host: heavens-above.com
    Accept: */*
            
    HTTP/1.1 200 OK
    Content-Length: 6228     
    Cache-Control: private
    Content-Type: text/html; charset=utf-8
    Server: Microsoft-IIS/7.5
    Set-Cookie: ASP.NET_SessionId=omogf40spcfeh03hvveie1ca; path=/; HttpOnly
    X-AspNet-Version: 4.0.30319
    X-Powered-By: ASP.NET
    Date: Sun, 29 Apr 2012 14:47:51 GMT
    Connection: keep-alive
            
EXPath HTTP Client HTTP Conversation
    GET /PassSummary.aspx?showAll=x&satid=25544&lat=50.7218&lng=-3.5336&loc=Unspecified&alt=0&tz=CET HTTP/1.1
    Host: heavens-above.com
    Connection: Keep-Alive
    User-Agent: Apache-HttpClient/4.1 (java 1.5)
            
    HTTP/1.1 404 Not Found
    Content-Length: 1176     
    Content-Type: text/html
    Server: Microsoft-IIS/7.5
    X-Powered-By: ASP.NET
    Date: Sun, 29 Apr 2012 14:48:33 GMT
    Connection: keep-alive
            

So what is going on here? Why does one request for the same URL succeed and the other fail? If we examine the requests the only difference is that the HTTPClient request includes a header 'Connection: keep-alive' whereas the cURL request does not, and the User-Agent header represents each client.

Persistent Connections

So What is 'Connection: keep-alive'? The HTTP 1.1 specification describes persistent connections in §8 starting on page 43. Basically a persistent connection allows multiple http requests and responses to be sent through the same TCP connection for efficiency. The specification states in §8.1.1:

"HTTP implementations SHOULD implement persistent connections."

and subsequently in §8.1.2:

"A significant difference between HTTP/1.1 and earlier versions of HTTP is that persistent connections are the default behavior of any HTTP connection. That is, unless otherwise indicated, the client SHOULD assume that the server will maintain a persistent connection, even after error responses from the server."

So whilst persistent connections 'SHOULD' be implemented rather than 'MUST' be implemented, the default behaviour is that of persistent connections, which seems a bit, erm... strange! So whether the client sends 'Connection: keep-alive' or not, the default is in effect 'Connection: keep-alive' for HTTP 1.1, therefore cURL and HTTPClient are semantically making exactly the same request.

If both cURL and HTTPClient are making the same request, why do they get different responses from the server? Well, we can check if persistent connections from the HTTPClient are the problem by forcing the HTTPClient to set a 'Connection: close' header as detailed here:

    http:send-request(
        <http:request method="get" href="http://heavens-above.com/PassSummary.aspx?showAll=x&satid=25544&lat=50.7218&lng=-3.5336&loc=Unspecified&alt=0&tz=CET">
            <http:header name="Connection" value="close"/>
        </http:request>
    )
            

Unfortunately we yet again get a HTTP 404 response. Which is actually correct if we assume that the implementations and server adhere to the specification. So the only remaining difference is the User Agent header.

User Agent

The only remaining difference is the User Agent string, but why would such a useful information website block requests from application written in Java using a very common library? I dont know! So perhaps we should choose a very common User Agent string, for example one from a major web browser and try the request again:

    http:send-request(
        <http:request method="get" href="http://heavens-above.com/PassSummary.aspx?showAll=x&satid=25544&lat=50.7218&lng=-3.5336&loc=Unspecified&alt=0&tz=CET">
            <http:header name="User-Agent" value="Mozilla/5.0 (Macintosh; Intel Mac OS X 10_7_3) AppleWebKit/535.19 (KHTML, like Gecko) Chrome/18.0.1025.165 Safari/535.19"/>
        </http:request>
    )                
            

and finally success:

    <http:response xmlns:http="http://expath.org/ns/http-client" status="200" message="OK">
        <http:header name="cache-control" value="private"/>
        <http:header name="content-type" value="text/html; charset=utf-8"/>
        <http:header name="server" value="Microsoft-IIS/7.5"/>
        <http:header name="x-aspnet-version" value="4.0.30319"/>
        <http:header name="x-powered-by" value="ASP.NET"/>
        <http:header name="date" value="Sun, 29 Apr 2012 15:54:52 GMT"/>
        <http:header name="expires" value="Sun, 29 Apr 2012 15:59:52 GMT"/>
        <http:header name="transfer-encoding" value="chunked"/>
        <http:body media-type="text/html"/>
    </http:response>
    <html xmlns:html="http://www.w3.org/1999/xhtml" xmlns="http://www.w3.org/1999/xhtml">
        <script src="http://1.2.3.4/bmi-int-js/bmi.js" language="javascript"/>
        <head>
            <title>ISS - Visible Passes </title>
            ...
            

Adam Retter posted on Sunday, 29th April 2012 at 14.28 (GMT+01:00)
Updated: Sunday, 29th 2012 at April 14.28 (GMT+01:00)

tags: EXPathHTTPClientUser AgentHTTP 1.1Persistent ConnectionsXQuerycURLIIS

0 comments | add comment

NASA Space Apps Challenge

@ The Met Office, Exeter

Predict The Sky Team, Space Apps Challenge, ExeterThis weekend I returned to Devon and attended the NASA Space Apps Challenge at the Met Office. This is only the second hackathon I have attended outside of the eXist-db sessions I have done in the past and it was great fun.

When we arrived we were given a few somewhat cheesy welcome videos from NASA and then presented with the challenges, I chose to join the “Predict the Sky” challenge.

The goal of the 'Predict the Sky' project was to create applications which would allow a user to know what objects are in the sky over their location at night, and the chances of them being able to see those objects based on the weather.

Each challenge group had their own space in the Met Office building in Exeter which was good because it was quiet, but bad because it restricted the easy cross-pollination of ideas and offers of help between the projects.

Personally, I think we were very lucky with the structure of our volunteer team, we had two designers, two mobile app developers (one IOS and one Android), two back-end programmers and a couple of web developers, this wide range of skills allowed us to address multiple targets at once.

I myself worked on the API for providing data to the Mobile Apps and Website. The goal of the API was to act as a proxy, whereby a single call to our API would call a number of other 3rd party APIs and scrape various websites, combining the data into a simple form useful for our clients.

Slide of Predict the Sky Mobile Phone AppsFor mashing up the data from the APIs and the Web in real-time based on requests coming to us, I decided to use XQuery 3.0 running on the eXist-db 2.0 NoSQL database. As the APIs I was calling produce XML, and extension functions from the EXPath project allow us to retrieve HTML pages and tidy them into XML, XQuery is a natural choice as its data-model and high-level nature enable me to munge the data in just a few lines of code, then store and query it into eXist-db with just a couple more lines. eXist-db also has a nice feature, whereby it provides a set of serializers for its XQuery processor, which enable me to process the XML and then choose at API invocation time whether to serialise the results as XML, JSON or JSON-P with just a single function call, this is great when different clients require different transport formats.

For my first attempt I took data from the UHAPI (Unofficial Heavens API) and the Met Office DataPoint API. I combined these two sources based on the time of a Satellite (e.g. The International Space Station or The Hubble Telescope) passing overhead and determined the weather at that time.

The first approach proved too limited as the UHAPI only provides data for the current day, whereas the Met Office is capable of providing a five day forecast in three hourly increments. The front-end developers wanted to be able to display the soonest Clear Sky event and then a chronological list of all upcoming events. Based on this I switched from the UHAPI to scraping the HTML tables from the Heavens Above website. The implementation was trivial in less than 100 lines of code, and the only pain really came from having to convert the arbitrary date formats used in the HTML for display into valid xs:date and xs:dateTime formats for later calculation.

The challenge started at 11am on Saturday and by finish time at 12pm on Sunday, the team were able to present that they had created a working API thats live on the web, complete design mock-ups of the Mobile UI, and both IOS and Android mobile app skeletons which talk to the API and show real results.

In addition the team was also able to identify data sources for Meteor Showers and Iridium Flares and did also complete the implementation of a number of coordinate mapping algorithms to help us establish the longitude and latitude of such events, although we ran out of time to implement these in the API code-base.

Slide of Cats in Space Hack (Liz Roberts)All in all, it was a great and very productive experience with some very clever and lovely people. Sadly our team did not win, but one of the judges was Sarah Weller from Mubaloo who said that she would be in-touch about seeing the applications through to completion and placing them in the various App Stores. So fingers-crossed!

Finally, many thanks to all the organisers at the Met Office and NASA.

Resources

Adam Retter posted on Sunday, 22nd April 2012 at 21.01 (GMT+01:00)
Updated: Monday, 23rd 2012 at April 19.13 (GMT+01:00)

tags: NASAMet OfficeSpace AppsXQueryXMLeXistIOSAndroid

0 comments | add comment

Connecting to OpenIndiana by XDMCP

Enabling XDMCP in OpenIndiana

I have a small NAS which I have built which run's OpenIndiana oi_151 and I wanted to be able to headlessly administer it, whilst I have SSH and thats all I really need, sometimes its nice to use a remote desktop environment.

XDMCP is a fundamental part of the X Window System, and one feature it offers is the ability to export your display across a network.

To enable XDMCP on OpenIndiana simply modify the XDMCP section in the file /etc/gdm/custom.conf so that it looks something like this -

# GDM configuration storage

[daemon]

[security]

[xdmcp]
Enable=true

[greeter]

[chooser]

[debug]


Now you just need to restart the GDM service -

$ sudo svcadm restart gdm                
            

Thats all there is to it!

Testing the XDMCP Connection

To connect to the XDMCP server, you need an X Server for your client machine, for Windows you can use Xming, or if you are on a Linux/Unix like platform you could use Xephyr, Xvfb, Xnest or similar. Personally im on MacOSX and Xephyr works very well for me -

$ Xephyr -query mnemosyne                
            

Screenshot of MacOSX Xephyr connected to OpenIndiana

Adam Retter posted on Saturday, 23rd July 2011 at 17.02 (GMT+02:00)
Updated: Saturday, 23rd 2011 at July 17.02 (GMT+02:00)

tags: OpenIndianaXDMCPMacOSXXephyrSolaris

0 comments | add comment

Installing Netatalk on OpenIndiana

ZFS for Mac Storage and Time Machine

It is possible to configure your OpenIndiana system to operate as a file server for your Mac using the AFP protocol, and if you have lots of lovely ZFS storage attached then it makes lots of sense. You can also configure OpenIndiana to act as as Time Capsule for your Mac's Time Machine!

The instructions below relate to OpenIndiana oi_151, and Apple Mac OSX Snow Leopard, however the procedure is probably much the same for all OpenIndiana versions. The Time Machine configuration does not work yet for Apple Mac OSX Lion, when I figure this out I will post the details.

Configuring OpenIndiana as an AFP File Server

First you need to install the pre-requisites for building Netatalk on OpenIndiana. You need gcc and BerkelyDB -

$ sudo pkg install gcc-dev 
            

You can download Berkeley DB from here. There are reported issues with version 5 and Netatalk, and so I used the latest 4.8 release. You then need to build and install Berkeley DB -

$ tar zxvf db-4.8.30.tar.gz
$ cd db-4.8.30/build_unix
$ ../dist/configure --prefix=/usr/local
$ make
$ sudo make install
            

Netatalk is a software package that acts as an AFP server. You can download Netatalk from here. You then need to build and install Netatalk -

$ tar xvjf netatalk-2.1.5.tar.bz2
$ cd netatalk-2.1.5
$ ./configure
$ make
$ sudo make install
            

After the install, Netatalk will be configured to share each users home folder. If you have additional folders that you wish to share with all users via. AFP you need to add them to /usr/local/etc/netatalk/AppleVolumes.default. I added these entries for my system -

/thevault/private/%u Private allow:@vusers
/thevault/public Public allow:@vusers
/thevault/timemachine TimeMachine allow:aretter
            

If you have different requirements for different Users then you can copy /usr/local/etc/netatalk/AppleVolumes.default to a Users home folder as AppleVolumes or .AppleVolumes and override the share settings for the user there.

If you want your AFP File Server to be auto-magically found via Apple's Bonjour service, you need to configure an Avahi service, this is done by creating the file /etc/avahi/services/afpd.service -

<?xml version="1.0" encoding="UTF-8"?>
<!DOCTYPE service-group SYSTEM "avahi-service.dtd">
<service-group>
    <name replace-wildcards="yes">%h</name>
    <service>
        <type>_afpovertcp._tcp</type>
        <port>548</port>
    </service>
    <service>
        <type>_device-info._tcp</type>
        <port>0</port>
        <txt-record>model=Xserve</txt-record>
    </service>
</service-group>

You now need to enable the Netatalk service and also the Avahi service, if you configured it above. Avahi also requires the Multicast DNS service -

$ sudo svcadm enable dns/multicast:default
$ sudo svcadm enable system/avahi-bridge-dsd:default

$ sudo /etc/rc2.d/S90netatalk start
            
Configuring TimeMachine on the Mac

If you created a TimeMachine AFP share above and wish to use your OpenIndiana server as a TimeCapsule also, then firstly you have to tell the Mac to allow unsupported network volumes for Time Machine. This can be done from the Terminal.app thusly -

$ defaults write com.apple.systempreferences TMShowUnsupportedNetworkVolumes 1
            

You need to create a sparse disk image file, which will be used for the content of the TimeMachine backups. This can be done with the Terminal.app. The naming of the disk image is quite specific and should be of the form hostname_MACaddress.sparsebundle. e.g. -

Find your hostname -

$ hostname
hollowcore
            

Find your MAC Address -

$ ifconfig
en1: flags=8863<UP,BROADCAST,SMART,RUNNING,SIMPLEX,MULTICAST> mtu 1500
    ether 90:27:e4:ea:7b:d4 
    inet6 fe80::9227:e4ff:feea:7bd4%en1 prefixlen 64 scopeid 0x4 
    inet 172.16.16.2 netmask 0xffffff00 broadcast 172.16.16.255
    media: autoselect
    status: active
</xh:pre>

Now substituting your own Hostname in place of 'hollowcore' and your own MAC Address in place of '9027e4ea7bd4' -

$ hdiutil create -size 300g -type SPARSEBUNDLE -fs JHFS+ -volname 'Backup of hollowcore' hollowcore_9027e4ea7bd4.sparsebundle                

Screenshot of MacOSX Connect to Server dialogYou should now mount your Time Machine share through the Finder by clicking Go -> Connect to Server... Entering afp://your-openindiana-hostname-here and then selecting the 'TimeMachine' share. You now need to copy the above Image file that you created to the mounted share.

Screenshot of MacOSX Time MachineYou can now launch TimeMachine, click 'Select Disk', wait for the mounted 'TimeMachine' share to appear and then click 'Use Backup Disk'.

Adam Retter posted on Saturday, 23rd July 2011 at 15.57 (GMT+02:00)
Updated: Saturday, 23rd 2011 at July 15.57 (GMT+02:00)

tags: OpenIndianaMacOSXTime MachineAFPNetatalkAvahiSolaris

3 comments | add comment

Installing Postgres 9.0 onto Amazon EC2 Linux

Amazon Linux and Postgres

Amazon EC2 Linux is based on a customised version of Redhat Enterprise Linux, but sadly they do not seem to have Postgres 9.0 available from their Yum repositories. However with a bit of fiddling around I was able to get it to install, so I have reproduced the details here for everyone else.

1) Download and install the appropriate YUM repository configuration from here - http://yum.pgrpms.org/reporpms/repoview/pgdg-redhat.html

   $ wget http://yum.pgrpms.org/reporpms/9.0/pgdg-redhat-9.0-2.noarch.rpm
   $ sudo rpm -i pgdg-redhat-9.0-2.noarch.rpm
            

2) You need to manually edit the Yum repo file that has just been installed for Postgres 9, as otherwise an unknown release version (as far as the Postgres repo is concerned) will be used, and you wont be able to download and install the packages.
Edit the file /etc/yum.repos.d/pgdg-90-redhat.repo and replace the string “$releasever” with “6.0”

3) You can now install Postgres 9.0 using Yum.

    $ sudo yum install postgresql90-server

4) You can now start up the database

            
    $ sudo /etc/init.d/postgresql-9.0 initdb
    $ sudo /etc/init.d/postgresql-9.0 start
            

5) Check that you can login to the server

            
    $ sudo su – postgres
    -bash-4.1$ psql
            
    psql (9.0.4)
    Type "help" for help.
            
    postgres=# 
            

Done :-)

Adam Retter posted on Saturday, 9th July 2011 at 16.02 (GMT+02:00)
Updated: Saturday, 9th 2011 at July 16.02 (GMT+02:00)

tags: AmazonAWSEC2LinuxPostgres

0 comments | add comment

LDAP query for Active Directory User's Primary Group

Java LDAP code for Active Directory

When querying AD (Active Directory) with LDAP (Light-weight Directory Access Protocol), it is possible to easily retrieve a lot of attribute information about a user. However, it is not obvious or straight-forward to understand how to find out the Primary Group that a user belongs to. Whilst you can get a list of groups from the 'memberOf' attribute on the 'user' object class, or even find groups by their members through the 'member' attribute of the 'group' object class, these lists do not include information about the User's Primary Group.

The 'user' Class, does provide a 'primaryGroupID' attribute, however the 'group' class does not contain a matching attribute that you can directly search against. However there is a trick! After quite some Googling and pulling information together from various sources, I have managed to achieve this, and to make it easier for everyone else, I am publishing a complete example.

PS. If you need to find a good LDAP querying and browse tool for examining the objects in AD LDAP, then I found Apache Directory Studio to be absolutely fantastic.

Basically, every object class in AD LDAP has an 'objectSID' identifier. This SID (Security Identifier) is a binary identifier provided as a byte array.

The binary expression of a SID has the following format:
byte[0] - Revision Level
byte[1] - count of Sub-Authorities
byte[2-7] - 48 bit Authority (big-endian)
...and then n Sub-Authorities, 32 bits each (little-endian)

e.g. -
[1,5,0,0,0,0,0,5,21,0,0,0,37,-20,73,58,97,-107,0,-80,109,-55,112,10,47,-24,5,0]                
            

The last sub-authority of a SID is known as the RID (Relative Identifier), and it is this RID that differentiates objects from within the same domain. This basically means that by replacing the RID in an SID you can generate the SID for a different object. The 'primaryGroupID' attribute from the 'user' class is a RID. So, we can take the SID of the user, and replace the RID part with the primary group id, we can then lookup the group in LDAP using this SID as the key.

A binary SID can be decoded into a string, which is both easier to understand and can also be used for subsequent queries within AD LDAP. The specifics of the SID string format can be found here.

The string expression of a SID has the following format:
“S-{Revision}-{Authority}-{SubAuthority1}-{SubAuthority2}...-{SubAuthorityN}”

e.g. -
“S-1-5-21-977923109-2952828257-175163757-387119”
            

I based my code for decoding a binary expression of a SID into a string expression on the code found here but I have tried to simplify and improve on the approach.

Java Code for decoding Binary a SID into a String SID:
/**
* The binary data is in the form:
* byte[0] - revision level
* byte[1] - count of sub-authorities
* byte[2-7] - 48 bit authority (big-endian)
* and then count x 32 bit sub authorities (little-endian)
* 
* The String value is: S-Revision-Authority-SubAuthority[n]...
* 
* Based on code from here - http://forums.oracle.com/forums/thread.jspa?threadID=1155740&tstart=0
*/
public static String decodeSID(byte[] sid) {

    final StringBuilder strSid = new StringBuilder("S-");
    
    // get version
    final int revision = sid[0];
    strSid.append(Integer.toString(revision));
    
    //next byte is the count of sub-authorities
    final int countSubAuths = sid[1] & 0xFF;
    
    //get the authority
    long authority = 0;
    //String rid = "";
    for(int i = 2; i <= 7; i++) {
        authority |= ((long)sid[i]) << (8 * (5 - (i - 2)));
    }
    strSid.append("-");
    strSid.append(Long.toHexString(authority));
    
    //iterate all the sub-auths
    int offset = 8;
    int size = 4; //4 bytes for each sub auth
    for(int j = 0; j < countSubAuths; j++) {
        long subAuthority = 0;
        for(int k = 0; k < size; k++) {
            subAuthority |= (long)(sid[offset + k] & 0xFF) << (8 * k);
        }
        
        strSid.append("-");
        strSid.append(subAuthority);
        
        offset += size;
    }
        
    return strSid.toString();    
}

A complete Java example complete with LDAP query code is available here LDAPTest.java.

Adam Retter posted on Friday, 1st July 2011 at 22.57 (GMT+02:00)
Updated: Friday, 1st 2011 at July 22.57 (GMT+02:00)

tags: Active DirectoryLDAPJavaPrimary GroupSID

1 comments | add comment

Configuring Hibernate with all Annotated classes in a Package

Supporting Wildcards with a Custom Hibernate Configuration Class

Using the Maven Hibernate plugin, I am automatically generating all Hibernate ORM model classes from my existing database schema. The ORM model classes that are generated have Hibernate and JPA (Java Persistence API) Java Annotations in them.

Sadly, Hibernate does not Scan for annotated classes at startup and so you have to configure Hibernate manually, either through an XML configuration file or programatically, so that it knows about your annotated classes. You have to tell it about each and every class, not only is this quite tedious, its also a pain to maintain as each time you add/remove an entity from your database, you have to remember to add/remove the ORM class to/from the Hibernate config.

An example of a hibernate.cfg file -
<?xml version="1.0" encoding="utf-8"?>
<!DOCTYPE hibernate-configuration PUBLIC
"-//Hibernate/Hibernate Configuration DTD 3.0//EN"
"http://www.hibernate.org/dtd/hibernate-configuration-3.0.dtd">
<hibernate-configuration>
    <session-factory>
        
        <!-- connection details -->
        <property name="hibernate.dialect">org.hibernate.dialect.PostgreSQLDialect</property>
        <property name="hibernate.connection.driver_class">org.postgresql.Driver</property>
        <property name="hibernate.connection.url">jdbc:postgresql://localhost/myDatabase</property>
        <property name="hibernate.connection.username">myUser</property>
        <property name="hibernate.connection.password">myPass</property>
        <!-- @see: http://community.jboss.org/wiki/HibernateCoreMigrationGuide36 -->
        <property name="hibernate.jdbc.use_streams_for_binary">false</property>
        
        <!-- mappings for annotated classes -->
        <mapping class="uk.org.adamretter.org.uk.someapp.web.orm.generated.Customer"/>
        <mapping class="uk.org.adamretter.org.uk.someapp.web.orm.generated.Order"/>
        <mapping class="uk.org.adamretter.org.uk.someapp.web.orm.generated.Item"/>
        <mapping class="uk.org.adamretter.org.uk.someapp.web.orm.generated.Customers"/>
        <mapping class="uk.org.adamretter.org.uk.someapp.web.orm.generated.Stock"/>
        <mapping class="uk.org.adamretter.org.uk.someapp.web.orm.generated.Shipping"/>
        <mapping class="uk.org.adamretter.org.uk.someapp.web.orm.generated.Billing"/>
        
    </session-factory>
</hibernate-configuration>

Considering that our classes are already annotated, having to configure them manually seems unnecessary to me. It would be useful if you could at least use Wildcards in the mappings of the configuration file so that you can indicate an entire package of classes should be mapped.

So, I decided to write my own Configuration class for Hibernate so that it could support Wildcards in class names, where when encountered it would load all the classes in the package. This massively simplified my hibernate.cfg file and remove the maintenance overhead.

Example of a hibernate.cfg file with Wildcard support -
<?xml version="1.0" encoding="utf-8"?>
<!DOCTYPE hibernate-configuration PUBLIC
"-//Hibernate/Hibernate Configuration DTD 3.0//EN"
"http://www.hibernate.org/dtd/hibernate-configuration-3.0.dtd">
<hibernate-configuration>
    <session-factory>
        
        <!-- connection details -->
        <property name="hibernate.dialect">org.hibernate.dialect.PostgreSQLDialect</property>
        <property name="hibernate.connection.driver_class">org.postgresql.Driver</property>
        <property name="hibernate.connection.url">jdbc:postgresql://localhost/myDatabase</property>
        <property name="hibernate.connection.username">myUser</property>
        <property name="hibernate.connection.password">myPass</property>
        <!-- @see: http://community.jboss.org/wiki/HibernateCoreMigrationGuide36 -->
        <property name="hibernate.jdbc.use_streams_for_binary">false</property>
        
        <!-- mappings for annotated classes -->
        <mapping class="uk.org.adamretter.org.uk.someapp.web.orm.generated.*"/>
        
    </session-factory>
</hibernate-configuration>

I enabled this by creating my own class AnnotationConfigurationWithWildcard which extends the org.hibernate.cfg.AnnotationConfiguration class. My goal was just to override the parseMappingElement method, however sadly this and a number of other methods were marked as private in the underlying org.hibernate.cfg.Configuration class, so I had to copy and paste a few methods into my implementation, but otherwise it was very simple. The Scanning for classes with annotations is done by JavaAssist which Hibernate already has a dependency on, and the only really new code I added is in the getAllAnnotatedClassNames method.

The Source Code for AnnotationConfigurationWithWildcard.java can be downloaded here.

Personally I am using Spring Framework to wire my application together, and as such I use the following Spring configuration to enable Hibernate and use my custom Hibernate configuration class -

<bean id="sessionFactory" class="org.springframework.orm.hibernate3.LocalSessionFactoryBean">
    <property name="configurationClass" value="org.hibernate.cfg.AnnotationConfigurationWithWildcard"/>
    <property name="configLocation" value="classpath:hibernate.cfg.xml"/>
</bean>

Adam Retter posted on Friday, 24th June 2011 at 23.26 (GMT+02:00)
Updated: Friday, 24th 2011 at June 23.26 (GMT+02:00)

tags: HibernateORMwildcardmappingpackageSpringMaven

0 comments | add comment

Moving to Frankfurt

Business and Adventure

Recently myself and some other core developers of eXist-db, an Open Source project which I have been involved in for over five years now, decided to start a commercial venture offering Support and Consultancy around the Open Source project: the new venture is called eXist Solutions.

Whilst it is still early days for our company, things have been going well. We are very much International in our approach and philosophy; in fact, at present no two shareholders of the company are even from the same country! I am one of two Directors of the company, and my counterpart Wolfgang Meier is based in Rüsselsheim, Germany.

Along with my partner Liz, we recently decided to move to Frankfurt for about six months (if all goes well). The reasons for this are two-fold: 1) to support the rapid start-up of eXist Solutions by working very closely with Wolfgang, and 2) to experience life and have an adventure in a foreign country with Liz for a prolonged period of time.

Below is my story of moving to Frankfurt from the UK and finding somewhere to live...

Tuesday 11th January

We left home in Exeter at 07.00 for Calais and briefly stopped at Clacket Lane for some brunch. We arrived at Calais an hour earlier than we expected, and so we visited all the sights:the Castle-- which was closed so were were asked to leave--and then the Morrisons carpark!

The ferry was meant to depart Dover for Calais at 13.50, but did not leave until after 14.30. The captain thought it would be a good idea to inform everyone that this was because one of the engines was not working. As a child of the 80's, who remembers clearly a number of Ferry disasters in the news, this was not the smoothest start to the Journey.However, as I had bought priority tickets (because I thought we would be tired), we had access to the Club Lounge, which was great. We had the entire place to ourselves, and we got to relax on sofas in front of big glass windows right on the bow of the ship whilst being provided with complimentary drinks.

Disembarking in Calais, we drove around to find a petrol station and cash-point, as I had been thoroughly warned about toll-roads (though we did not encounter one). Refuelled, we then headed on towards Bruxelles. Whilst driving in France was smooth, driving in Belgium was somewhat intimidating as all the vehicles we encountered were moving fast and acting aggressively.

I have never been to Bruxelles before (except whilst changing trains for the Euro Star), the city itself is a completely mad place to drive in, full of multi-lane tunnels, on/off-ramps, and aggressive drivers. Without the Sat-Nav, we would have been completely screwed.

Liz and I at the BeerFactoryWe arrived at the Mariott Executive Apartments around 17.30; very comfortable apartment and bed awaited, but not before a quick swim (why was the pool so cold?) and then popping out to sample a couple of Belgian Beers at the local Beer Factory.

Wednesday 12th January

We left Bruxelles at 07.30 heading for Frankfurt. The journey was easy enough, and whilst there is no real speed limit on parts of the Auto Bahn, I found the driving easier than in Belgium, apart from, of course, the odd racing driver in the outside lane pushing us aside. We saw some snow on our journey around the fields outside of Köln; unfortunately, it died out as we headed further south.

We had arranged to stay at Paragon Apartments, a serviced apartment complex in Frankfurt. As we came into Frankfurt, we realised that these were located in Niederrad, which was quite fortunate, as we had stayed here on a previous visit and had some experience of navigating into the centre of Frankfurt by public transport from there.

We reached the apartment at about 12.00, where we checked-in and unloaded the car. We had a brief rest and then started flat hunting at 14.15. We had pre-arranged to view four flats via an agency in Frankfurt called CityResidence. The first three flats that we viewed were located in the Bornhein and Nordend areas of Frankfurt, and the last was located in the banking sector in Innedstat. After flat hunting we returned to our apartment to try and make a decision. Each flat had advantages and disadvantages.We decided to settle on a flat in Vogelsbergstraße, located very close to Bergerstraße in Bornheim. This is a very vibrant area which Liz was keen on. On contacting CityResidence by phone to make an offer, we were informed that the landlady may not be keen as we are quite a short-term let, and that they also had another client viewing the property the next day, so they would inform us the following morning.

Feeling deflated, we had a quick sleep and then headed out into Frankfurt for dinner. We had a great dinner at a fantastic little Thai restaurant we found on the web called Ko Samui, it had a very good vegetarian menu and a great atmosphere.

Thursday 13th January

Finally we had a lie-in! After not hearing from the property agent in the morning we checked our email, to find that our offer had been accepted and that we had to sign a contract and immediately pay the deposit and first months rent for the apartment. Before coming to Germany I set up a personal account with CitiBank as they were one of the easiest options for maintaining a personal account in Euros whilst being a UK resident. However having to now immediately transfer a couple of thousand Euros presented an issue. I could not withdraw substantial quantities from an ATM, and neither could I walk into a local branch and arrange the transfer.

We made arrangements, and then visited CityResidence's offices where we signed the contracts and attempted to do the transfer via. CitiBank's website whilst they witnessed it; however, this failed spectacularly. Unfortunately CitiBank's Internet Banking is very limited and whilst it would let me transfer Pounds Sterling to almost anywhere, it is not much use when your account is maintained in Euros, and it won't let you send Euros. Finally I arranged the transfer via. telephone with CitiBank and they agreed to fax a confirmation to CityResidence.

For the afternoon, we explored the streets and shops around where our new apartment would be. We then walked down and up Bergerstraße itself and had a great meal at Manolya a Turkish restaurant we had visited on a previous trip to Frankfurt with friends from the eXist-db project.

Friday 14th January

Picture of our letter boxThe day that we move into our new apartment :-)

However, first I had some business to attend to. I had arranged to visit the TIGZ Innovation Centre in Gustavsburg, just outside Mainz with my co-Director of eXist Solutions Wolfgang Meier, with the idea of renting some new office space for eXist Solutions. The TIGZ Centre is a pleasant old red-brick building, with lots to offer in terms of meeting and conferencing facilities alongside modern office space.Picture of our flat

That afternoon, we spent in Rüsselsheim with Wolfgang trying to arrange Broadband Internet for our new flat and mobile phone Sim Cards. It seems that making such arrangements is incredibly complex, and quite a lot of it requires that you are a German citizen with an ID Card. Unfortunately we have as yet not been able to arrange Internet or Mobile Phones for Liz and I, but I am hopeful that we can arrange something soon.

Picture of us unpackingThe afternoon was also unfortunately plagued by administrative stress, as CitiBank had not sent a fax confirmation of the money transfer to CityResidence. After several phone calls to CityBank, and several assurances that this would be done within the hour, no fax was ever received by CityResidence. I feel greatly let down. Fortunately CityResidence agreed to accept a print-out from my Internet Banking showing the money transfer.

At 17.00 we moved into our flat in Vogelsbergstraße. Its not a big flat, just 47sqm, with two rooms plus a bathroom. Rental prices in Frankfurt are astronomical for furnished flats. We are paying €890 / month and we have to pay an additional commission to the agent which I think is ~200€ / month. But its a nice enough flat ground floor flat with a small terrace, and I feel very positive about the flat and the area that we are living in.Picture of our building


In Summary...

So far, apart from the odd small issue, which is to be expected, everything has been quite easy for us. Whilst letting agents in Germany have a much lesser role than in the UK (whilst charging much more) and appear to be little more than a property advertising mechanism, if our letting agents had not been able to speak fantastic English, then I suspect this would have been much harder for us as our German language skills are very basic.

Adam Retter posted on Sunday, 16th January 2011 at 16.46 (GMT+01:00)
Updated: Sunday, 16th 2011 at January 16.55 (GMT+01:00)

tags: FrankfurtBruxellesCityResidenceCityBankBergerstraßetravelmoving

4 comments | add comment

Open Indiana Web Hosting

My entic.net Virtual Private Server Migration

I have been hosting my own websites for a couple of years now with a company called Entic.net. Entic.net offer Solaris hosting, by providing full VPS's (Virtual Private Server's) via Solaris Zones technology, they are a great little company with excellent personal support. I am so happy with their service and assistance over the last couple of years, that I really feel I have to sing their praises in public!

I originally started out with Entic.net in mid 2008, when I was looking for affordable Solaris 10 hosting after doing some benchmarking with an eXist-db application and discovering that the best performance was achieved when running atop Solaris 10. Entic.net were at that time able to provide me with a Sun Solaris 10 VPS (curd.entic.net) for just $20 USD/month. Whilst it was located in their US San Jose data center and I am in the UK, I decided that the geographical location did not really matter to me, after all we are both connected to the web!

In June 2009 they assisted me (at no charge!) in migrating to an Open Solaris VPS (well.entic.net) again still at $20 USD/month, for someone who also spends a lot of time in Linux, the move to Open Solaris made server admin much easier - due to the integration of more GNU tools when compared to its predecessor.

As I am an incurable technology junkie, and had been wondering about where to go from Open Solaris now that Oracle have taken over, I contacted Entic.net and enquired about their plans. To my joy I found out that they were already operating some Open Indiana servers and would be more than happy to help me migrate (again at no charge!) if I so wished. I also learnt that Entic.net had expanded and now also have a London data center, and that I could choose to have VPS's located in either.

I jumped at the chance, so Entic.net (well actually, I did it via their self-service web dashboard) setup a new Open Indiana VPS (rama.entic.net), in parallel to my existing VPS and allowed me to migrate in my own time. Entic.net VPS dashboardI decided to locate my new VPS in London, im not sure why, but it felt right. I also took the opportunity to increase the memory available to my VPS, taking the cost from $20/month USD to $31 USD/month total, but thats still cheap! Increasing the memory is again completely automated via their self-service web dashboard, changes take effect within minutes, and without needing to reboot the VPS!

So... I now have my shiny new Open Indiana Web Server up and running, I am of course running eXist-db and Nginx on here, and so far it all seems fast and stable. I may consider a follow up article detailing the steps to setup eXist-db and Nginx on Open Indiana if there is enough interest.

...and, a big thank you to everyone at Entic.net for your excellent service and support, Cheers!

Adam Retter posted on Monday, 22nd November 2010 at 16.39 (GMT+01:00)
Updated: Monday, 22nd 2010 at November 22.16 (GMT+01:00)

tags: Open IndianaOpen SolarisSolarisentic.netwebhosting

2 comments | add comment

NetBeans Platform Application - Memory Settings

For applications that arent small

I have been working on an application for annotating TEI texts on behalf of Oxford University Computing Services. The application embeds the oXygen XML Author v12 into the NetBeans Platform v6.9, whilst severely restricting the functionality of oXygen. The purpose of restricting oXygen is to simplify the UI and options available to the end user; The user may not have a high level of computer literacy.

I had a problem whereby opening a large TEI document in the application failed to work. The problem turned out to be a lack of available memory for the application.

NetBeans allows you to build installers for your application for a variety of Operating Systems, however by default it ships a configuration file ($app_dir/etc/app_name.conf) with your application, that restricts the memory to a maximum of just 64MB!

Increasing this option is not obvious or well documented, after some Googling, searching of the NetBeans Platform forum and some trial and error, I have managed to increase this setting that is installed by the Installers.

Step 1 - Build the Installers

NetBeans build installers

Step 2 - Examine the file - build/launcher/etc/app_name.conf

# ${HOME} will be replaced by user home directory according to platform
default_userdir="${HOME}/.${APPNAME}/dev"
default_mac_userdir="${HOME}/Library/Application Support/${APPNAME}/dev"

# options used by the launcher by default, can be overridden by explicit
# command line switches
default_options="--branding teiannotator -J-Xms24m -J-Xmx64m"
# for development purposes you may wish to append: -J-Dnetbeans.logger.console=true -J-ea

# default location of JDK/JRE, can be overridden by using --jdkhome <dir> switch
#jdkhome="/path/to/jdk"
    
# clusters' paths separated by path.separator (semicolon on Windows, colon on Unices)
#extra_clusters=
            

The line of interest is the one starting "default_options", -J-Xmx64m indicates that the maximum memory for your NetBeans Platform Application will be 64MB

Step 3 - Increase the memory setting

As the file in step 2 is generated automatically when you build the installers, you need to override this setting in the build itself. This can be done by modifying your build.xml file. e.g. -

<?xml version="1.0" encoding="UTF-8"?>
<!-- You may freely edit this file. See harness/README in the NetBeans platform -->
<!-- for some information on what you could do (e.g. targets to override). -->
<!-- If you delete this file and reopen the project it will be recreated. -->
<project name="TEI Annotator NB Application" basedir=".">
<description>Builds the module suite TEI Annotator NB Application.</description>
<import file="nbproject/build-impl.xml"/>

<target name="build-launchers" depends="suite.build-launchers">
<replace file="build/launcher/etc/${app.name}.conf" token="--branding teiannotator -J-Xms24m -J-Xmx64m" value="--branding teiannotator -J-Xms24m -J-Xmx384m"/>
</target>

</project>
            

Step 4 - Re-Build the Installers

...And your done :-)

Adam Retter posted on Saturday, 2nd October 2010 at 22.00 (GMT+01:00)
Updated: Saturday, 2nd 2010 at October 22.00 (GMT+01:00)

tags: NetBeansTEIjavaoXygenXmxmemory

2 comments | add comment

jQuery XHTML Checkbox problems

Making it work

Whilst working on some jQuery (1.4.2) script in combination with the eXist-db bibliographic demo app, I had a situation whereby I was trying to switch XHTML form input checkboxes on and off when the user took certain actions.

I was using code similar to the following -

if(readPermissions.size() + writePermissions.size() >= 1) {
     $('#sharing-collection-with-other').attr('checked','checked');
} else {
     $('#sharing-collection-with-other').removeAttr('checked');
}

Which is very similar to what you will find on the web if you look for solutions to check and uncheck checkboxes with jQuery. Unfortunately this for me just would not work, whenever the user checked a check box I was completely unable to check it. Examining it with the debugger in Chrome I could see something like the following after removeAttr(...) is called - 

$('#sharing-collection-with-group'): Object
$('#sharing-collection-with-group').attr('checked'): undefined
$('#sharing-collection-with-group').is(':checked'): true

Now what drove me nuts is the last line from the debugger, was how can .is(':checked') return true when the attribute has been removed?

After an hour or so of Googling, trying different things and banging my head against the desk, I gave up and visited the jQuery IRC channel on FreeNode. After some explaining, trying a few suggestions and general disbelief, a very kind soul by the handle 'temp01' offered to take a look at my site and see what was going on.

'temp01' after confirming the problem soon noticed that I was using XHTML for my page content and not HTML. Apparently jQuery has some issues around XHTML and non-minimizable attributes such as 'checked'. There is a workaround however that he kindly provided me and I can confirm that it works well.

My fixed code now looks like this -

if(readPermissions.size() + writePermissions.size() >= 1) {
   $('#sharing-collection-with-other').get(0).checked = true;    
} else {
   $('#sharing-collection-with-other').get(0).checked = false;
}

Perfect! Thanks to the jQuery IRC community and especially to 'temp01' whomever you may be.

Adam Retter posted on Tuesday, 14th September 2010 at 13.04 (GMT+01:00)
Updated: Friday, 24th 2010 at September 05.56 (GMT-07:00)

tags: jQueryXHTMLcheckboxchecked

1 comments | add comment

The Not So Mobile Phone

Samsung i7500 Galaxy

Nokia N95 small pictureSince the beginning of this year I have been looking out for a new phone to replace my ageing Nokia N95. My main requirement was that it must be suitable for Web and email use - a large colour screen, integration with Web 2.0 services (such as Twitter and Facebook), 3G and WiFi radios and available on an unlimited data tariff. Secondly the phone must have a decent camera, the 5 Mega-pixel camera and flash built into the N95 is excellent.

Initially I was waiting for the release of the Nokia N97 in June, but due to some unfavourable early reviews, its bulky design and the fact that it looked that if I was to drop it, I might end up with two phones, I decided to search for something else.

HTC Hero small pictureAfter hearing much news of Google's Android over the previous months I decided to look into which phones might be available with Android. As a Software Developer and Open Source advocate, Android really appeals to me due to its non-proprietary software and application store - as opposed to Apple's offerings! It turned out that there were not a great deal of Android phones available at that time. I did find some vague rumours and information on the upcoming HTC Hero and decided to wait a little longer for its release.

At the beginning of August I was able to play with a real HTC Hero in my local Orange shop. Whilst I was very impressed, I was also very disappointed that the built in Camera lacked a flash. I often take photos when we are out with friends in the evenings and this would not be possible without a flash. So I went back to the web and started Googling for more upcoming Android phones, I soon stumbled upon the Samsung i7500 Galaxy which looked perfect for my needs. Unfortunately it would not be available in the UK until September, so I resigned myself to waiting a little longer.

Samsung i7500 Galaxy Conclusions

Samsung Galaxy small pictureWell its now early October and I finally got myself a new Samsung i7500 Galaxy on O2.
I was completely amazed by this phone, its small, light and compact with a huge beautiful screen. Android's integration with the Web is excellent. I have been using Google's messaging services for years and to now have my phone's address book and calendar synced with my GMail contacts and calendar, and to have new emails and GoogleTalk IM's pushed directly to my phone is quite something.

One thing that takes some getting used to with the Galaxy (perhaps this is just because I come from a Nokia world) is relinquishing control. The Galaxy seems to be always connected to the Web and it communicates with the Google services as and when it needs to, with an unlimited data contract this is fine, but it takes some getting used to. Also, none of the applications on the Galaxy have an “Exit” option or button, the phone seems to manage the applications life-cycle itself which seems strange at first, but really makes things much easier. Using the touch screen when your used to a keypad is strange and very slow at first, but you soon get the hang of it.

Unfortunately this phone has one really serious drawback, so much so in fact that I have just returned mine to O2. The problem is the battery!
After my first day of use the phone seemed to run down fast, but I put this down to me playing with my new gadget. On the second day, I left my phone plugged in until 9am in the morning, through the day I received one 20 minute call, made one 2 minute call and checked my email once or twice (pretty light use), the battery died before 11pm that evening – that is less than 14 hours battery life!!!

In my opinion the Galaxy is NOT a useable mobile phone: It does not last even one day between charges :-(

And so...

I have fallen back to my trusty N95 and again I am waiting for a decent Android phone to be released. If any phone designers are reading this, then I need a decent one piece Android Web phone that comes with a reasonable camera and flash. Perhaps one of these will eventually fulfil my needs - Upcoming - Android Phones and Rumoured Android Phones.

Adam Retter posted on Monday, 14th September 2009 at 18.56 (GMT+01:00)
Updated: Monday, 14th 2009 at September 18.56 (GMT+01:00)

tags: NokiaN95N97HTCAndroidSamsungi7500GalaxyBattery

1 comments | add comment

Data 1, Disk 0

NAS disk failure

NAS disk failure outputAfter having finally built my NAS and had it happily working away in the background for a couple of weeks, it would seem that failure has struck; one of the disks forming the ZFS RAIDZ2 storage pool has failed! Whilst I am sure this seems a little ironic or sounds like a commissioned advert for ZFS by Sun, I can only try to reassure you that this is not the case.

Recently I experienced an unexpected crash with the NAS (no network response whatsoever), I am still unsure of the cause but have not had the time to investigate further. However, after powering the NAS off (ouch!) and back on again, I did take a quick look to make sure my data was intact by checking the zpool status. Unfortunately the bad news was that the pool status was reported as "degraded" with details of a failed disk, the good news however (and the whole point behind this setup) was that my data was fine :-)

I am fairly new to ZFS so I made some enquiries with the seasoned professionals in #opensolaris on FreeNode, to make sure that the errors I was seeing were definitely hardware related and not misconfiguration on my part. Whilst I was surprised that such a new disk would fail so soon, I was pointed to something called the "bathtub curve", which can be seen in chapter 4.2 of this paper. The "bathtub curve" basically follows that there will be high failure rates at the begining of a product's life (infant mortality) and at the end (wear-out); the statistics gathered in a further paper by Google entitled "Failure Trends in a Large Disk Drive Population" also seems to back this to a certain extent.

Overall I was glad to be reassured that this was a hardware failure and not a mistake on my part, and most importantly that I lost no data. The failed disk will shortly be replaced by the supplier, lets hope the replacement lasts a little longer.

Adam Retter posted on Sunday, 12th July 2009 at 17.50 (GMT+01:00)
Updated: Sunday, 12th 2009 at July 17.50 (GMT+01:00)

tags: ZFSZPOOLfailNASdiskOpenSolaris

1 comments | add comment

Building my DIY NAS

DIY NAS - Part 3 of 3

After previously deciding to build my own NAS, having defined my requirements in Part 1 and identified suitable hardware and software in Part 2, I will now discuss the build first in terms of the physical hardware build and then the software installation and configuration.

Hardware

I will not detail the exact build process for the Chenbro chassis as that information is available in the manual, instead I will try and capture my own experience, which will hopefully complement the available information.

Once all the parts had arrived, the first think to do was un-box everything before starting to put the system together. My immediate impression of the Chenbro ES34069 NAS chassis was that it was robustly built and manufactured to a high standard.
Box with DVDRW, Card Reader and Cable. Chenbro NAS chassis removedUnpacked Chenbro chassis and boxed disk drives1.0TB hard disks, packed two in each box

The first step in building the NAS with the Chenbro chassis, is to open up the chassis and then install the Motherboard. To open up the Chassis you need to remove the side cover and then the front panel.
Chenbro chassis with side cover removedChenbro chassis with motherboard tray removedChenbro chassis with secured motherboard

The second step is to get the Card Reader, DVD-RW and 2.5" Hard Disk for the operating system in place and cabled to the motherboard. The Hard disk needs to go in first, followed by the Card Reader and then the DVD-RW. I realised this too late, but luckily the DVD-RW is easily removed!
Chenbro chassis front panel removedChenbro chassis front panel with DVDRW fittedBack of Chenbro chassis front panel with DVDRW fitted

The third step is to finish connecting any cables, secure the cables away from the fan (I used some plastic cable ties for this) and then switch on and check that the system POSTs correctly. I did this before inserting any of the storage disks in the hot swap bays for two reasons - 1) if there is an electrical fault, these disks wont also be damaged, 2) if there is a POST fault, it rules out these disks as a possibility.
Chenbro NAS complete side viewChenbro NAS Power OnChenbro NAS POST

The final step is to install the storage disks into the hot swap caddies and those into the hot swap bays of the NAS.

This is where I hit upon a show stopper. Securing the disks in the hot swap caddies requires some special low profile screws, these seemed to be missing, I checked the manual and it stated that these were shipped with the chassis, but unfortunately not for me :-(.

After a week of not hearing from the supplier and unable to find suitable screws, I cracked and decided to improvise. The mounting holes on the hot swap caddies are a combination of plastic layered on metal, I reasoned that by cutting away the top plastic layer I would have more space for the screw heads. Very carefully I removed the plastic around the screw holes using a sharp knife, I am sure I probably voided some sort of warranty, but now standard hard disk mounting screws fit perfectly :-). Chenbro Disk Caddie before modificationChenbro Disk Caddie after modificationFinally loading the disks into the NAS

Software

A standard installation of OpenSolaris 2009.06 from CD-ROM was performed. Once the installation was completed, the remaining configuration was completed from the terminal.

ZFS Storage Configuration

As previously discussed in Part 2, I decided to use a RAIDZ2 configuration across the 4 1TB storage disks.

To configure the disks, I first needed to obtain their id's, this can be done using the format command -

                aretter@mnemosyne:~$ pfexec format
                Searching for disks...done
                
                
                AVAILABLE DISK SELECTIONS:
                0.  c8d0 <DEFAULT cyl 9726 alt 2 hd 255 sec 63>
                /pci@0,0/pci-ide@1f,1/ide@0/cmdk@0,0
                1.  c9d0 <WDC WD10-  WD-WCAU4862689-0001-931.51GB>
                /pci@0,0/pci-ide@1f,2/ide@0/cmdk@0,0
                2.  c9d1 <WDC WD10-  WD-WCAU4864114-0001-931.51GB>
                /pci@0,0/pci-ide@1f,2/ide@0/cmdk@1,0
                3.  c10d0 <WDC WD10-  WD-WCAU4862741-0001-931.51GB>
                /pci@0,0/pci-ide@1f,2/ide@1/cmdk@0,0
                4.  c10d1 <WDC WD10-  WD-WCAU4848518-0001-931.51GB>
                /pci@0,0/pci-ide@1f,2/ide@1/cmdk@1,0
                Specify disk (enter its number): ^C                                    
        

From this we can see that disks 1 through 4 are our 1TB storage disks. The following command uses the ids of these disks to create a new RAIDZ2 zpool called 'thevault' consisting of these disks -

                aretter@mnemosyne:~$ pfexec zpool create thevault raidz2 c9d0 c9d1 c10d0 c10d1                
        

We can then view/check the newly created zpool -

                aretter@mnemosyne:~$ pfexec zpool list
                NAME       SIZE   USED  AVAIL    CAP  HEALTH  ALTROOT
                rpool       74G  4.06G  69.9G     5%  ONLINE  -
                thevault  3.62T  1.55M  3.62T     0%  ONLINE  -
                
                aretter@mnemosyne:~$ pfexec zpool status thevault                
                pool: thevault
                state: ONLINE
                scrub: none requested
                config:
                
                NAME            STATE       READ    WRITE   CKSUM
                thevault        DEGRADED    0       0       0
                raidz2      DEGRADED    0       0       0
                c9d0    ONLINE      0       0       0
                c9d1    ONLINE      0       0       0
                c10d0   ONLINE      0       0       0
                c10d1   ONLINE      0       0       0
                
                errors: No known data errors
        

Now that we have our zpool we need to create some filesystems to make use of it. This NAS system will be used on our home network and so I opted for two simple filesystems, a 'public' filesystem which everyone may read and write to and a 'private' filesystem for more personal data -

                aretter@mnemosyne:~$ pfexec zfs create thevault/public
                aretter@mnemosyne:~$ pfexec zfs create thevault/private
                
                aretter@mnemosyne:~$ pfexec zfs list
                NAME                        USED  AVAIL  REFER  MOUNTPOINT
                rpool                      4.92G  67.9G  77.5K  /rpool
                rpool/ROOT                 2.85G  67.9G    19K  legacy
                rpool/ROOT/opensolaris     2.85G  67.9G  2.76G  /
                rpool/dump                 1019M  67.9G  1019M  -
                rpool/export               84.5M  67.9G    21K  /export
                rpool/export/home          84.5M  67.9G    21K  /export/home
                rpool/export/home/aretter  84.5M  67.9G  84.5M  /export/home/aretter
                rpool/swap                 1019M  68.8G   137M  -
                thevault                    180K  1.78T  31.4K  /thevault
                thevault/private           28.4K  1.78T  28.4K  /thevault/private
                thevault/public            28.4K  1.78T  28.4K  /thevault/public
        
Users and Permissions

Now that we have our filesystems we need to setup some accounts for our network users and assign permissions on the filesystems for the users.

I will create accounts for each of the three other people in the house and to make permission administration easier, each of these users will also be added to a common group called 'vusers' -

                aretter@mnemosyne:~$ pfexec groupadd vusers
                
                aretter@mnemosyne:~$ pfexec groupadd phil
                aretter@mnemosyne:~$ pfexec groupadd lesley
                aretter@mnemosyne:~$ pfexec groupadd andy
                
                aretter@mnemosyne:~$ pfexec useradd -c “Philip” -g phil -G vusers -m -b /export/home -s /bin/bash phil
                aretter@mnemosyne:~$ pfexec useradd -c “Lesley” -g lesley -G vusers -m -b /export/home -s /bin/bash lesley
                aretter@mnemosyne:~$ pfexec useradd -c “Andrew” -g andy -G vusers -m -b /export/home -s /bin/bash andy
        

So that all users in the 'vusers' group can read and write to the public filesystem, I set the following permissions -

                aretter@mnemosyne:~$ pfexec chgrp vusers /thevault/public
                aretter@mnemosyne:~$ pfexec chmod g+s /thevault/public
                aretter@mnemosyne:~$ pfexec chmod 770 /thevault/public
        

I then set about creating a private folder for each of the users on the private filesystem. All users in 'vusers' can access the private filesystem, but users cannot access each others private folder -

                aretter@mnemosyne:~$ pfexec chgrp vusers /thevault/private
                aretter@mnemosyne:~$ pfexec chmod 770 /thevault/private
                
                aretter@mnemosyne:~$ pfexec mkdir /thevault/private/phil
                aretter@mnemosyne:~$ pfexec chmown phil:phil /thevault/private/phil
                aretter@mnemosyne:~$ pfexec chmod 750 /thevault/private/phil
                
                aretter@mnemosyne:~$ pfexec mkdir /thevault/private/lesley
                aretter@mnemosyne:~$ pfexec chmown lesley:lesley /thevault/private/lesley
                aretter@mnemosyne:~$ pfexec chmod 750 /thevault/private/lesley
                
                aretter@mnemosyne:~$ pfexec mkdir /thevault/private/andy
                aretter@mnemosyne:~$ pfexec chmown andy:andy /thevault/private/andy
                aretter@mnemosyne:~$ pfexec chmod 750 /thevault/private/andy
        
Network Shares

Well this is a NAS after all, and so we need to make our filesystems available over the network. Apart from myself, everyone else in the house uses Microsoft Windows (XP, Vista and 7) on their PCs, and because of this fact I decided to just share the filesystem using OpenSolaris's native CIFS service.

I used this this article in the Genuix Wiki as a reference for installing the CIFS service. I took the following steps to install the CIFS service and join my workgroup '88MONKS' -

                aretter@mnemosyne:~$ pfexec pkg install SUNWsmbskr 
                aretter@mnemosyne:~$ pfexec pkg install SUNWsmbs
                
                ...I had to reboot the system here, for the changes to take effect...
                
                aretter@mnemosyne:~$ pfexec svcadm enable -r smb/server
                aretter@mnemosyne:~$ pfexec smbadm join -w 88MONKS
        

To authenticate my users over CIFS I needed to enable the CIFS PAM module by adding this to the end of /etc/pam.conf -

                other password required pam_smb_passwd.so.1 nowarn
        

Once you have enabled the CIFS PAM module, you need to (re)generate passwords for your users who will use CIFS, this is done with the standard 'passwd' command. Then the last and final step is to export the ZFS filesystems over CIFS -

                aretter@mnemosyne:~$ pfexec zfs create -o casesensitivity=mixed thevault/public
                aretter@mnemosyne:~$ pfexec zfs create -o casesensitivity=mixed thevault/private
        
Build Issues

When building your own custom system from lots of different parts (some of which are very new to market), there are likely to be a few unanticipated issues during the build and this was no exception. Luckily the issues I had were all minor -

  • Not enough USB port headers - The MSI IM-945GC motherboard I used only had two USB headers. I used these to connect the NAS SD card reader, which meant that I could not connect the USB sockets on the front of the NAS chassis. This is not a major problem as I can just use the sockets on the back.
  • Missing hard disk caddy screws - As soon as I discovered these were missing, I contacted mini-itx.com by email (they have no phone number). After several emails and only one very poor response saying they would look into it, I gave up on mini-itx.com. As described above, I managed to work around this issue, although after about 3 weeks a package of screws did turn up in the post unannounced and I can only assume these are from mini-itx.com. My advice to anyone would now be DO NOT USE mini-itx.com, their after-sales customer service is abysmal, I probably should have guessed by the fact that when I made a pre-sales enquiry they never even replied!
  • Fitting everything in - Mini-ITX form cases, can be quite a tight fit once you have all the cabling in. I would recommend avoiding using large cables such as IDE where possible. It took me a couple of attempts at re-routing my cables to make best use of the available space.
usage Findings

Once the NAS was built and functional I decided to make some measurements to find out its real power consumption (whether it is as low as I had hoped) and also its network performance for file operations.

Plug-in energy monitorFor measuring the power usage I used a simple Plug-in Energy monitor that I got from my local Maplin store. Whilst this device gives me a good idea of power consumption, it is actually very hard to get consistent/reliable figures from it, as the readout tends to fluctuate quite rapidly. The figures I present here are my best efforts and the average figures are based on observation not calculation.

For measuring the network performance, I placed a 3.1GB ISO file on the public ZFS RAIDZ2 filesystem and performed timed copies of it to two different machines using both SCP and CIFS. The first machine was a Dell Latitude D630 Windows XP SP3 laptop, which is connected to our home Gigabit Ethernet LAN using 802.11g wireless networking (54Mbit/s) via our router. The second machine I used was a custom desktop based on an AMD Phenom X4, MSI K92A Motherboard with Gigabit Ethernet, 8GB RAM and Ubuntu x64 9.04, which is connected directly to our home Gigabit Ethernet LAN.

Power and Performance

Task Description Actual Power Consumption Performance
Standby (Power-off) 2W N/A
Boot 50W N/A
Idling 40W to 47W (avg. 42W) N/A
File Duplication on RAIDZ2 ZFS 54W to 57W (avg. 55W) 50MB/s
SCP Copy to Wifi Laptop 40W to 57W (avg. 42W) 473KB/s
CIFS Copy to Wifi Laptop 40W to 57W (avg. 42W) 1.2MB/s
SCP Copy to GbE Desktop 48W to 52W (avg. 49W) 22MB/s
CIFS Copy to GbE Desktop 49W to 52W (avg. 50W) 25MB/s
Conclusions

Overall I am very happy with my DIY NAS system, I believe it meets the requirements I set out in Part 1 very well. It is physically small and quiet, provides 2TB of reliable storage and does not use any proprietary drivers.

The power consumption is slightly higher (42W to 50W) than I estimated (33W to 50W), which is not unsurprising considering I only had figures for some components and not a complete system. However, I have also measured the power consumption of my desktop with and without the old HighPoint RAID 5 storage that I am aiming to replace with this NAS, and without it I have saved a huge 40W! Admittedly I am now using 10W more overall, but I have a networked storage system that is used by the whole house. I think if I replaced my desktop's primary hard disk with a Western Digital Green drive I could probably claw back those additional watts anyhow.

I am very happy with the network performance, and it is more than adequate for our needs. I have been told that I could probably increase it with careful tuning of various OpenSolaris configuration options.

The cost whilst high for a home IT mini-project, is not unreasonable, and I think I would struggle to find a commercial product at the same price point which offered the same capabilities and flexibility.

Further Considerations

We have both an XBox 360 and PlayStation 3 in our house that can be used as media streamers. The PS3 requires a DLNA source and the 360 a UPnP source, and it looks like ps3mediaserver should support both. However ps3mediaserver also requires a number of open source tools such as MPlayer and ffmpeg amongst others. There are no OpenSolaris packages for these, so I will have to figure out how to compile them, which will take some time.

A website for controlling and administering the NAS would be a nice feature. Especially if you could schedule HTTP/FTP/Torrent downloads straight onto the NAS. When I have a rainy week, I may attempt this. I could see this eventually leading to a custom cut-down OpenSolaris distribution built especially for NAS.

Adam Retter posted on Sunday, 5th July 2009 at 20.10 (GMT+01:00)
Updated: Sunday, 5th 2009 at July 20.10 (GMT+01:00)

tags: ChenbroOpenSolarisNASDIYZFSRAIDZ2CIFS

12 comments | add comment

Choosing Software and Hardware for my DIY NAS

DIY NAS - Part 2 of 3

In deciding to build my own NAS, after having identified my requirements in Part 1, I set about searching for the perfect hardware and software combination...

There are plenty of open source operating systems available that offer multiple options for reliable storage, including both hardware and software supported RAID. To avoid getting into the situation of outdated/unsupported hardware again, I have decided not to use any sort of hardware assisted RAID, instead I will use the software RAID support provided by the operating system itself.

Many of these operating systems support a vast array of system hardware, however I did not want to just reuse a standard PC/Server because of its large power requirements and physical size when compared to commercial NAS systems aimed at the SMB (Small and Medium Business) Market.

Software

Linux, FreeBSD and OpenBSD all offer options for software RAID. There are also a number of distributions specifically designed for NAS appliances such as OpenFiler (based on Linux) and FreeNAS (based on FreeBSD), however I have settled on OpenSolaris because of ZFS and its RAIDZ feature. Also worthy of a mention is the very interesting and well suited looking NexentaStor (based on OpenSolaris), but the added goodness is not open source, so I will consider it no further.

A few reasons why I chose OpenSolaris and ZFS -

  • OpenSolaris is based on Solaris (it feels solid, just like Solaris)
  • OpenSolaris has CIFS and NFS support built in
  • ZFS RAIDZ and RAIDZ2 provide better than RAID functionality
  • ZFS has 256 bit checksumming and self healing
  • ZFS does not suffer from the RAID-5 write hole
  • ZFS snapshots

Looking at ZFS and the reliability of disk failures I decided to go for a RAIDZ2 approach, which requires at least 4 disks.
RAIDZ2 is an advancement of the traditional RAID-6. It writes a double-parity and parity is distributed across the disks. In this configuration approximately 50% of your total disk space is available for file storage and the other 50% is used for parity information. In RAIDZ2 with four disks, continuous operation is ensured even with the failure of two of the disks.

Simon Breden has written some excellent blog entries on building a home fileserver using ZFS, he has informed my decisions and I think perhaps he explains the salient points more eloquently. A article of Simon's on the advantages of using ZFS is here

Hardware

My first and by far hardest task was finding a suitable chassis for my DIY NAS. I wanted it to hold at least four disks for storage, and one disk for its operating system – so a total of 5 disks... and it needed to be physically small, this is my home not a data-center.

Norco NS-520 NAS Chasis - front/side viewOriginally after much searching, I found the Norco NS-520, which looked absolutely perfect; it supported 6 disks, came with a Mini-ITX motherboard, Celeron-M processor, 512MB RAM, 180W PSU and was physically small (277x187x230mm). Unfortunately the cheapest option was shipping it directly from the manufacturers in Shenzhen, China at $687 =~ £464.82. The cost seemed high (and would of been higher after import duty and VAT) and the maximum power consumption was more than I had hoped for.

Chenbro ES340059 NAS Chasis - front view
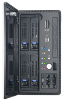
The only other NAS chassis that I eventually found was the Chenbro ES34069, again it ticked all the boxes; it supported 5 disks, accepted a Mini-ITX motherboard, had a small 120W PSU and was physically small (260x140x260mm). It was also available from a UK reseller for £205.85 inc.VAT. Cheaper than the Norco (even after adding a motherboard, CPU and RAM) and the maximum power consumption was lower :-)

For the Chenbro chassis I needed to source my own Mini-ITX motherboard. The main requirement was that it support at least 4 SATA disks for my storage and an additional IDE/SATA disk for the operating system and have a low power consumption. Finding a motherboard with a low-power CPU and at least 4 SATA ports turned out to be a tough task, I found only two –

  • VIA EPIA SN 18000 EG – VIA 1.8GHz C7 32bit CPU / 26W - £178.25 from mini-itx.com (inc. VAT)
  • MSI IM-945GC – Intel Atom N330 1.6GHz Dual Core 64bit CPU / 24.33W Max - $169.00 from orbitmicro.com (£191.13 after currency exchange, import VAT and handling charges)

I chose MSI's Intel Atom board as it offered considerably more processing power at lower power consumption, it is also 64 bit unlike the VIA - there are rumoured problems with ZFS on 32 bit systems.

I would also like to take a moment to congratulate MSI on their excellent pre-sales technical support, a quick call to their UK office and within a day their Taiwan office had emailed me the power consumption specifications for the motherboard :-)

The complete bill of materials and estimated power consumption follows. The remaining items were chosen for their suitability with the chasis and motherboard and/or for their low power consumption.

Bill of Materials

Supplier Part Description Cost
mini-itx.com Euro C5 Power Cord £3.00
2.5” to 3.5” IDE Hard Disk Adapter £7.50
Sony Optiarc AD-7590A-01 Trayload Slimline DVD+-RW Drive £37.50
2GB DDR2 667 DIMM for EPIA SN / Atom / JNC62K and Socket LGA775 Boards £29.00
Chenbro 4-in-1 Card Reader (SD/Mini-SD/MMC/MCS) £9.50
Chenbro ES34069 Mini-ITX Home Server/NAS Chassis £179.00
SHIPPING £12.00
VAT £41.63
Sub Total £319.13


CCL Computers 4 x 1TB Western Digital Caviar Green 3.5” SATA 3Gb/s Hard Disk (WD10EADS) £247.96
80GB Seagate Momentus 5400.3 2.5” IDE Hard Disk (ST980815A) £35.85
SHIPPING £5.21
VAT £43.35
Sub Total £332.37


PC World Power Cable Y Splitter (4-pin Molex to 4-pin Molex + 4-pin Floppy) £3.39
VAT £0.51
Sub Total £3.90


Orbit Micro MSI IM-945GC Mini-ITX Motherboard, Intel Atom 330 Dual Core 1.6GHz $169.00
SHIPPING TO UK (USPS) $57.69
Sub Total $ $226.69
VISA Exchage Rate @ 1.46082 £155.18
Overseas Transaction Fee £1.00
Pracelforce Import VAT £21.45
Parcelforce Handling fee £13.50
Sub Total £191.13

TOTAL NAS COSTS £846.53

Estimated Power Consumption

Part Idle Power Consumption Max Power Consumption Quantity Total Idle Power Consumption Total Max Power Consumption
MSI IM-945GC Motherboard 17.46W 24.33W 1 17.46W 24.33W
1 TB Western Digital Caviar Green Hard Disk (WD10EADS) 3.70W 6.00W 4 14.80W 24.00W
80GB Seagate Momentus Hard Disk (ST980815A) 0.80W 2.00W 1 0.80W 2.00W

TOTAL ESTIMATED POWER CONSUMPTION 33.06W 50.33W

Read more in Part 3 - Building my DIY NAS.

Adam Retter posted on Tuesday, 2nd June 2009 at 23.00 (GMT+01:00)
Updated: Tuesday, 7th 2009 at July 17.59 (GMT+01:00)

tags: NASRAIDZOpenSolarisChenbroMSI

5 comments | add comment

In need of Open Storage

DIY NAS - Part 1 of 3
The Background

A few years ago I came to the conclusion that I needed reliable storage for some of my more important work related files; should I lose such files, work opportunities and/or money could be at risk. I purchased a HighPoint TechnologiesRocketRAID 1640 PCI SATA card along with three 250GB Seagate SATA Hard Disks, and added to my home main desktop computer this gave me a reasonable RAID 5 setup.

At the time I was running FreeBSD 6.x and Windows XP and both were well supported by HighPoint. Whilst I have upgraded the desktop computer several times since its original build, the RocketRAID card and disks have always remained a reliable constant. More recently, after some failures with Windows Vista 64, I have opted to use Ubuntu as my primary operating system at home. Unfortunately when I upgraded to the latest release of Ubuntu (9.04), I found that my RocketRAID card no longer functioned. I contacted HighPoint but they reported that they are no longer supporting the RocketRaid 1640 with newer Linux Kernels.

So without installing an older operating system supported by the RocketRAID drivers I can no longer access my files! Whilst I admit I cannot expect HighPoint to support old hardware forever, this eventuality was unexpected and I was a little shocked! I needed to resolve this problem and fast, so that I could continue working with my important files.

The Problem

Whilst I was using an open source operating system, I was relying on an old piece of hardware with proprietary closed source drivers. This eventually failed!

Requirements

A new reliable storage system with greater operating system and driver independence.

This storage system should be decoupled from my desktop computer and accessible by my other computers; so that upgrades and/or failures of my computers do not have an effect on my ability to access my important files.

  • Reliable storage (RAID 5 or better)
  • Accessible from several computers (NAS/SAN)
  • 100% Open Source (no proprietary drivers!)
  • Energy Efficient operation (may be switched on 365x24x7)
  • Large storage space (1TB+)
  • Custom software extensions (I want to be able to add my own features)
  • Quiet and unobtrusive
  • As cheap as possible

Identifying the Solution

I need an independent networked device, and that device is a NAS, a SAN would be complete overkill for my needs and well beyond my budget.

I looked at a LOT of commercially available NASs from the likes of HP, D-Link, Netgear, Linksys, Buffallo, Western Digital and Seagate to mention but a few. I also looked at open source software projects for the above. Whilst almost all of them offered fairly reasonable power consumption, a reasonable price and ease of use, I could not find a single good combination of reliable storage and open software between them. It seemed that all of them would lock me into some vendor's proprietary software or that the open source communities replacement software was not reliable or mature enough.

Soon enough, I realised that to get everything that I wanted, I was going to have to build my own.

Read more in Part 2 - Choosing Software and Hardware for my DIY NAS.

Adam Retter posted on Sunday, 31st May 2009 at 22.35 (GMT+01:00)
Updated: Tuesday, 2nd 2009 at June 23.00 (GMT+01:00)

tags: NASRAIDStorageOpen SourceHighpoint TechnologiesEnergy Efficient

0 comments | add comment

A blast from the past

the first serious code I wrote???

Recently I had been unpacking some boxes of older and more obscure belongings that I never felt the need to unpack, I have moved house twice since 2004 and these boxes have only just been unsealed! Whilst looking through the contents, I found some old 3.5” floppy disks and low density ones at that – wow! One of those disks turned out to contain the code for something called “SM~ART”, which made me feel very nostalgic; although for the life of me I cant remember what the acronym stands for!

Amstrad PC3286

SM~ART was quite possibly the first serious project that I ever undertook in software. It was 1997 and I was 16 years old and in the final year of my GSCE studies at school. Since as long as I can remember I have always had an interest in electronics, which unfortunately (for my family) as a kid meant me taking things apart (sometimes they also went back together again). With the first family computer an Amstrad PC3286 I became equally as interested in computers. Anyway, I digress, I had been studying GCSE Electronics and with my final year project approaching I decided I should undertake something to get top points and really show everyone that I meant business.

Hardware

With the help of the book “Interfacing PCs and Compatibles” by R.A. Penfold, I embarked on a seriously ambitious project to design a 16-Bit ISA bus card for the PC for data acquisition. The card basically just extended the bus to a socket which was then connected to the data acquisition hardware in an external housing. The ISA bus card had a hard wired address decoder built out of 74LS* TTL logic chips, and the acquisition hardware consisted of an Intel 8225A general purpose I/O chip, and a couple of 8-bit analogue to digital converters; this allowed a configuration of either three 8-bit parallel ports or one 8-bit parallel port and 2 analogue ports. I will publish the schematics if I ever find them.

Software
SM~ART Main Screen

So I had the hardware, but that would of been useless without some software to operate it – so I developed SM~ART. SM~ART was written in Microsoft QBasic 4.5 on our 286 PC at home. I think I probably chose QBasic at the time because it was just enough to get the job done, I had a couple years hobby QBasic experience and QBasic provided the INP and OUT statements which enabled me to read or write directly to a specific hardware address – in this case my data acquisition hardware.

SM~ART consisted of a very simple graphical interface with a number of screens - Console (for communicating with the hardware), Change Settings (various settings for communicating with the hardware), Change Colours (change the screen colours of the SM~ART interface). All of the settings were persistable to disk and I think it was also possible for it to create log files of data received from the hardware, or for it to accept a file of commands to execute against the hardware.

Conclusions

Well I submitted both the hardware and the software which were graded pretty high. Unfortunately it was never possible to test the two working together, no one had a PC they were willing to risk me destroying with potentially faulty hardware, so that counted against my grade a little.

I had a look through the QBasic source code for SM~ART and I have to say that I am pretty impressed. Whilst its 'basic', it actually seems pretty clean, there are some comments (could probably use more) and its logically organised; I have to say I am quite happy with my yesteryear coding skills :-)

Source code is available here if anyone is interested - SMART.zip

Adam Retter posted on Wednesday, 22nd April 2009 at 12.30 (GMT+01:00)
Updated: Wednesday, 22nd 2009 at April 12.30 (GMT+01:00)

tags: CodeQBasicHardware8255ASoftwarePC Interface

1 comments | add comment

XML Prague 2009

and the launch of EXQuery.org

I attended the XML Prague conference again this year; it was great to go back again after it took a break last year. Personally, I think this was probably the best one yet, with excellent content all round.

Me with EXQuery Poster @ XMLPrague

This is the third time I have attended, but it was the first time that I have had any input into the conference outside of my involvement in eXist.

I presented a poster on EXQuery at the conference, a project I have had in mind for some time for creating standards for XQuery Application Development. I registered for this just one month before the conference! This meant an immense rush to get the EXQuery website content up to scratch as well as designing my poster, slide and handouts. However my efforts came to fruition, as whilst the poster itself received little attention, my known attendance regarding EXQuery facilitated many useful conversations with great members of the XML community; I was even able to recruit Priscilla and Florent to participate in the EXQuery core team! All of the feedback I received from everyone I spoke to was overwhelmingly positive and encouraging :-)

Other highlights from the conference for me included -

Michael Kay on XML Schema 1.1.

At last we can now do all the things with XML Schema that we need to without having to resort to a two step validation approach with XML Schema as the first step and some other constraint processing mechanism as the second step; personally I have been using XQuery here, but it was interesting to hear from Michael that a lot of people have been using XSLT for this.

Jeni Tenison on XSpec

My current employer takes testing very seriously (as one should of course), Test Driven Development is the mandated software development approach there. With that in mind it was very interesting to see existing testing methodologies, in this case Behaviour Driven Development, being bought to bare on XSLT in the form of XSpec. This is certainly something I will be introducing on any future projects with complex XSLT requirements.

Priscilla Walmsley on FunctX

I was pleasantly surprised to learn she had a custom approach and model for documenting her FunctX functions. I had been previously considering the best way to document any functions that are created for the EXQuery function libraries and Priscilla seems to already have an excellent approach to this. Hopefully a lot of the lessons learnt here can be reused and applied to EXQuery function libraries.

Norman Walsh on XProc

I saw Normans XProc presentation at XML Prague 2007 and knew that they were onto a good thing, I meant to go away and attempt an implementation atop eXist but shamefully never got around to it. This years XProc presentation revived all of the good feelings that it had previously invoked in me in 2007. I really do believe that this is an excellent technology and that for any XML Application Server (e.g. eXist) it really is the glue needed to pull applications together.

Robin Berjon on SVG

I used to naively think that SVG was just another graphics format. This presentation completely blew me away. You can do WHAT with SVG now!!! Goodbye browser plugins, hello accessible web :-)

Michael Kays beard!

In case you hadnt heard - its missing... presumed dead ;-)

Adam Retter posted on Monday, 30th March 2009 at 22.51 (GMT+01:00)
Updated: Wednesday, 1st 2009 at April 20.16 (GMT+01:00)

tags: XML PragueEXQueryXQueryXML SchemaXSLTXSpecFunctXXProc

0 comments | add comment

Tag Cloud